
在 AI 领域,模型推理的环境配置和安装过程常常让人头疼。如果你也有这样的困扰,那么 llamafile 将会是你的福音。本文由 deepin(深度)社区用户川顺页创作,让你一文学会如何玩转 llamafile!
llamafile到底是什么?
llamafile 是一种可在你自己的电脑上运行的可执行大型语言模型(LLM),它包含了给定的开放 LLM 的权重,以及运行该模型所需的一切。让人惊喜的是,你无需进行任何安装或配置。
llamafile如何实现这一切?
这一切都得益于 llama.cpp 与 Cosmopolitan Libc 的结合,提供了强大的功能:
- 跨 CPU 微架构运行:llamafiles 可以在多种 CPU 微架构上运行,支持新的 Intel 系统使用现代 CPU 特性,同时兼容旧计算机。
- 跨 CPU 架构运行:llamafiles 可以在 AMD64 和 ARM64 等多种 CPU 架构上运行,兼容 Win32 和大多数 UNIX shell。
- 跨操作系统运行:llamafiles 可以在 MacOS、Windows、Linux、FreeBSD、OpenBSD和 NetBSD 六种操作系统上运行。
- 权重嵌入:LLM 的权重可以嵌入到 llamafile 中,使得未压缩的权重可以直接映射到内存中,类似于自解压缩的存档。
llamafile支持哪些操作系统和CPU?
llamafile 支持 Linux 2.6.18+、Darwin (MacOS) 23.1.0+、Windows 8+、FreeBSD 13+、NetBSD 9.2+、OpenBSD 7+ 等操作系统。在 CPU 方面,支持 AMD64 和 ARM64 两种微处理器。
llamafile对GPU的支持如何
llamafile 支持 Apple Metal、NVIDIA 和 AMD 三种类型的 GPU。在 MacOS ARM64 上,可以通过编译一个小模块来支持 GPU。NVIDIA 和 AMD 显卡的所有者需要传递特定参数来启用 GPU。
你也可以创建自己的llamafiles!
有了这个项目包含的工具,你可以创建自己的 llamafiles,使用任何你想要的兼容模型权重。然后,你可以将这些 llamafiles 分发给其他人轻松地使用它们,无论他们使用的是什么类型的计算机。
llamafile 无疑是一个强大的工具,它使得模型推理变得更加便捷,无需安装或配置复杂的环境。如果你还在为模型推理的环境配置而烦恼,那么为何不试试 llamafile 呢?具体可以参考这个教程:https://zhuanlan.zhihu.com/p/686886176《利用llamafile构造傻瓜式,支持多平台启动的大模型》
如何在deepin上使用?
打开终端,运行 sh ./xxxx.llamafile
如何在Windows上面使用?
改后缀为.exe,双击打开即可。
如何使用GPU运行而不是CPU?
需要装好 NVIDIA/AMD 驱动,对应 NVIDIA,还应该装了 CUDA,然后在运行时加上 -ngl 99999 即可,这个代表将 99999 层(实际也就几百上千层)网络都搬到 GPU,如果你显存不够,可以适当降低这个数值,比如 99、999 等。
综合来看,对于 deepin: sh ./xxxx.llamafile -ngl 99999
对于 Windows: ./xxx.lamafile.exe -ngl 9999
获取地址
百度网盘链接:
https://pan.baidu.com/s/14cv7McPa1XpXBNKy914HyQ?pwd=msjn 提取码:msjn
123云盘链接:
https://www.123pan.com/s/oEqDVv-IP4o.html 提取码:8MCi
(注:后缀.exe 可以忽略,因为 llamafile 是跨平台的,可以同时在 Linux、Windows、Mac、BSD上运行。)
使用截图

如何接入其他客户端?
推荐这个,一键拥有你自己的跨平台 ChatGPT/Gemini 应用:
《ChatGPTNextWeb/ChatGPT-Next-Web: A cross-platform ChatGPT/Gemini UI (Web / PWA / Linux / Win / MacOS)》
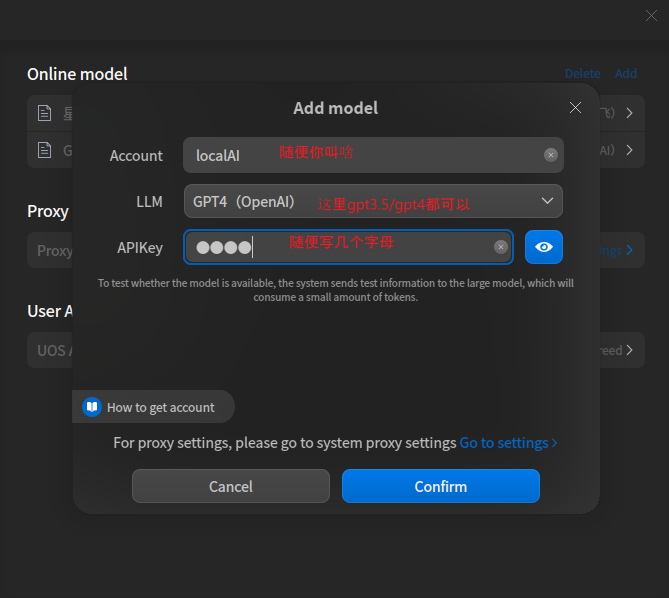
安装后再设置,模型服务商选择 OpenAI,接口地址换成 http://127.0.0.1:8080
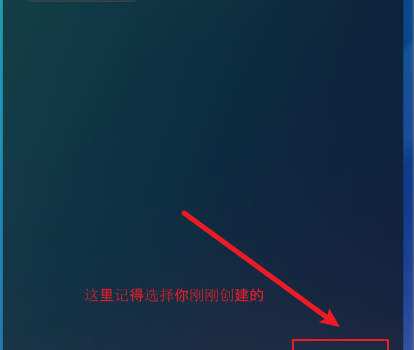
接入UOS-AI(不推荐普通用户尝试)
- 先启动 llamafile。
- 再安装 NGINX sudo apt install nginx
- 利用 OpenSSL 自签名 SSL 证书,有效期 10 年。
openssl req -newkey rsa:2048 -x509 -nodes -keyout localhost.key -new -out localhost.crt -subj /CN=Hostname -reqexts SAN -extensions SAN -config <(cat /usr/lib/ssl/openssl.cnf \
<(printf ‘[SAN]\nsubjectAltName=DNS:hostname,IP:127.0.0.1’)) -sha256 -days 3650
- 在 NGINX 配置目录,创建证书目录,将刚刚的证书移过去。
sudo mkdir /etc/nginx/cert/
sudo cp localhost.* /etc/nginx/cert/
- 编辑NGINX默认网站配置文件,sudo vim /etc/nginx/sites-enabled/default 配置如下:
##
# You should look at the following URL’s in order to grasp a solid understanding
# of Nginx configuration files in order to fully unleash the power of Nginx.
# https://www.nginx.com/resources/wiki/start/
# https://www.nginx.com/resources/wiki/start/topics/tutorials/config_pitfalls/
# https://wiki.debian.org/Nginx/DirectoryStructure
#
# In most cases, administrators will remove this file from sites-enabled/ and
# leave it as reference inside of sites-available where it will continue to be
# updated by the nginx packaging team.
#
# This file will automatically load configuration files provided by other
# applications, such as Drupal or WordPress. These applications will be made
# available underneath a path with that package name, such as /drupal8.
#
# Please see /usr/share/doc/nginx-doc/examples/ for more detailed examples.
##
# Default server configuration
#
server {
listen 80 default_server;
listen [::]:80 default_server;
# SSL configuration
listen 443 ssl default_server;
listen [::]:443 ssl default_server;
ssl_certificate cert/localhost.crt;
ssl_certificate_key cert/localhost.key;
ssl_session_timeout 5m;
ssl_ciphers ECDHE-RSA-AES128-GCM-SHA256:ECDHE:ECDH:AES:HIGH:!NULL:!aNULL:!MD5:!ADH:!RC4;
ssl_protocols TLSv1 TLSv1.1 TLSv1.2;
ssl_prefer_server_ciphers on;
# Add index.php to the list if you are using PHP
index index.html index.htm index.nginx-debian.html;
# server_name _;
server_name api.openai.com;
location / {
proxy_pass http://127.0.0.1:8080;
proxy_set_header Host $host;
proxy_set_header X-Real-IP $remote_addr;
proxy_set_header X-Forwarded-For $proxy_add_x_forwarded_for;
}
}
- 重启 NGINX。
sudo systemctl restart nginx
- 修改本机 Host,将本机 IP: 127.0.0.1 映射到刚刚配置的 api.openai.com ,修改方法:sudo vim /etc/hosts 在任意行增加一行 127.0.0.1 api.openai.com
- 然后按照该内容:https://bbs.deepin.org/zh/post/267049 让 UOS AI 进入英语环境,这样才能添加 ChatGPT 设置。
- 添加配置:
- 添加成功(电脑配置差的可能要多试几次):

- 开始使用:
注意:目前选择 GPT3.5/GPT4 在 UOS AI 里貌似不支持流式传输,也就是没办法一个字一个字吞吐,导致要等待较长时间,等所有字都预测好了才会返回,体验较差,而其他 API 比如讯飞星火是支持流的,所以建议还是用 llamafile 自带的网页聊天窗吧。
can you take buspirone when pregnant
long term effects of celexa
actos hydrochlorothiazide
https://t.me/s/Portable_FavoritoBet
https://t.me/vavada_win_vavada/78
https://t.me/s/Portable_Malina
https://t.me/sDragonMoney_Portable
https://t.me/R2T_7k/9479
https://t.me/s/Casino_1win_1win_1win
https://t.me/cVavada_vavada
acheter viagra france acheter viagra sans ordonnance
meilleur site viagra acheter viagra sans ordonnance
https://t.me/s/TeleCasino_1Win/975868
https://telegra.ph/Top-15-onlajn-kazino-bez-registracii-igraj-bez-lishnih-hlopot-08-01
https://t.me/s/play_1win_online
https://t.me/s/top_casino_rating_igrat
https://t.me/s/official_1_winn
https://t.me/officials_dragonmoney/2
https://t.me/s/EF_BEEF
https://t.me/s/it_martiN_cASINo
http://images.google.lt/url?q=https://t.me/s/OFFICiaLs_7k_casINo
https://t.me/s/kazino_s_minimalnym_depozitom
https://t.me/s/russiA_cASinO_1wiN
https://s/t.me/s/tx_1win/52
https://t.me/s/officlal_1win
https://t.me/s/prodvizhenie_telegram_v_top
Эксклюзивные предложения
платежные методы казино
abilify changed my life
https://t.me/s/Portable_Casher
https://t.me/vavada_win_vavada/615
https://t.me/s/Portable_Jetton
https://t.me/sDragonMoney_Portable
https://t.me/R2T_7k/9479
https://t.me/s/Casino_1win_1win_1win
https://vk.com/wall-231374912_65
1Win — онлайн-казино с широкой линейкой игровых автоматов, живыми дилерами и ставками на спорт. Платформа предлагает высокие коэффициенты, бонусы и акции для игроков. Простота регистрации, быстрая поддержка и удобный интерфейс делают игровой опыт комфортным. Однако важно помнить о рисках азартных игр и играть ответственно.
https://t.me/s/mobile_1win/126
acheter viagra 100mg prix viagra
acheter viagra sans ordonnance meilleur site viagra
prix viagra viagra livraison rapide
viagra en ligne acheter viagra
https://t.me/cVavada_vavada
https://t.me/s/TeleCasino_1Win/970428
https://telegra.ph/Rejting-15-nadezhnyh-kazino-s-licenziej-dlya-igry-na-dengi-08-01
https://t.me/s/Webs_1win/361
viagra homme achat viagra
https://t.me/s/TgWin_1win/482
https://taplink.cc/toprucasino
https://t.me/s/Casino_top2
https://t.me/s/official_1_winn
https://t.me/s/official_pokerdom_pokerdom
https://t.me/officials_dragonmoney/3
https://t.me/s/EF_BEEF
https://t.me/s/it_marTiN_cASino
https://www.the-mainboard.com/proxy.php?link=https://t.me/s/offICIALs_7k_CasIno
https://t.me/s/kazino_s_minimalnym_depozitom
https://t.me/s/it_ezcash
https://t.me/s/russIa_CaSino_1win
https://s/t.me/s/tx_1win/76
https://t.me/s/top_onlajn_kazino_rossii
https://t.me/s/officlal_1win
https://t.me/s/prodvizhenie_telegram_v_top
acarbose generic
https://t.me/s/Portable_Pokerstars
https://t.me/sDragonMoney_Portable
https://t.me/R2T_7k/9479
https://t.me/s/Casino_1win_1win_1win
1Win — онлайн-казино с широкой линейкой игровых автоматов, живыми дилерами и ставками на спорт. Платформа предлагает высокие коэффициенты, бонусы и акции для игроков. Простота регистрации, быстрая поддержка и удобный интерфейс делают игровой опыт комфортным. Однако важно помнить о рисках азартных игр и играть ответственно.
https://t.me/s/TopTg_1win
https://t.me/s/TeleCasino_1win/1003
achat viagra meilleur site viagra
https://t.me/TeleCasino_1Win/4
acheter viagra 100mg prix viagra
viagra livraison rapide acheter viagra
https://t.me/s/play_1win_online
https://t.me/top_casino_rating_igrat
https://t.me/s/official_1_winn
https://t.me/s/kazino_s_minimalnym_depozitom
https://t.me/s/russiA_cASINo_1wIN
https://t.me/s/prodvizhenie_telegram_v_top
80 units of semaglutide
Развлекайся и выигрывай в казино 1win!
https://t.me/s/Portable_Jambo
1 win
https://t.me/vavada_win_vavada/444
https://t.me/sDragonMoney_Portable
https://t.me/s/OC_Mostbet
https://t.me/s/OcCasinoTop/38
https://t.me/R2T_7k/9479
https://t.me/s/Casino_1win_1win_1win
https://vk.com/wall-231374912_65
https://t.me/s/TopTg_1Win
acheter viagra commander viagra en ligne
https://t.me/cVavada_vavada
https://t.me/s/TeleCasino_7K
acheter viagra prix viagra
https://t.me/s/TeleCasino_1Win/993728
https://telegra.ph/Top-15-chestnyh-onlajn-kazino-s-bystrymi-vyplatami-rejting-proverennyh-platform-08-01
https://t.me/s/Web_1win
https://t.me/s/official_1win_site_2025/25
https://t.me/s/Official_1win_official_1win/394
acheter viagra 100mg viagra livraison rapide
https://t.me/s/top_casino_rating_igrat
https://t.me/s/Officiall_1win_ru
https://t.me/s/official_1win_aviator
https://t.me/s/ef_beef
https://t.me/s/official_pokerdom_pokerdom
https://t.me/mcasino_martin/203
https://t.me/officials_dragonmoney/11
https://t.me/s/EF_beef
https://t.me/s/it_marTIN_CAsino
https://ll8kx.bemobpath.com/?redirecturl=https://t.me/s/OfFICIals_7k_cAsiNo
https://t.me/s/kazino_s_minimalnym_depozitom
https://t.me/ta_1win/400
https://s/t.me/s/tx_1win/553
https://t.me/s/top_onlajn_kazino_rossii
Официальный канал 1 вин https://t.me/s/casino1win_rus
https://t.me/s/prodvizhenie_telegram_v_top
actos eye
https://t.me/s/Portable_Pinco
https://t.me/s/DragonMoney_Portable
https://t.me/R2T_7k/9479
https://t.me/s/Casino_1win_1win_1win
https://t.me/s/Official_casino_1win_1win
achat viagra achat viagra
viagra générique prix viagra
viagra homme acheter viagra 100mg
https://t.me/Official_1xbet_1xbet
https://t.me/s/top_kazino5/528
https://t.me/s/kazino_s_minimalnym_depozitom
acarbose absorption
https://t.me/s/vavada_official_vavada
https://t.me/s/R2T_7k
viagra homme acheter viagra
viagra livraison rapide viagra pas cher
https://t.me/s/kazino_s_minimalnym_depozitom
is abilify dangerous
https://t.me/s/vavada_official_vavada
https://t.me/s/Tg_Official_1win
https://t.me/Official_1xbet_1xbet
https://t.me/s/top_kazino5/603
https://t.me/s/kazino_s_minimalnym_depozitom
Официальный Telegram 1win — канал, где лежит то, что обычно ищут по 10 вкладкам:
промокоды 1win, бонусы 1win, рабочая ссылка / зеркало 1win, обновления приложения 1win, короткие ориентиры по линии и коэффициентам на матчи + апдейты по казино 1win.
Зашёл. Взял. Применил. !+! https://t.me/s/reg_official_1win/45 !+!
Подписка на 1win Telegram — чтобы важное приходило первым, а не “когда уже поздно”.
Программа лояльности
служба поддержки казино
remeron for sleep dosage
https://t.me/s/vavada_win_vavada/68
https://t.me/s/Portable_ArtSpin
https://t.me/s/DragonMoney_Portable
https://t.me/R2T_7k/9479
https://t.me/s/Casino_1win_1win_1win
https://t.me/Martin_Casino_TG/820
https://t.me/s/TeleCasino_1win/4807
https://t.me/s/TeleCasino_1Win/4
https://t.me/s/play_1win_online
https://t.me/Official_1xbet_1xbet
https://t.me/s/top_kazino5
промокоды казино без мусора — один канал, где всё по делу
Не люблю охоту за «рабочими кодами» по шумным чатам. Хочется нажать — и видеть: что дают, куда вводить, до какого времени. Без квестов, без капса, без «срочно успей».
Держу под рукой один источник: https://t.me/s/Best_promocode_rus
В ленте — короткие карточки: промо на слоты, live, crash; пометка «актуально сегодня»; сразу видно, есть ли фриспины или бонус к депозиту. Никаких загадок. Открыл, посмотрел, решил — подходить ли под твой план на вечер.
Почему это удобно? Потому что экономит внимание. Ты не читаешь километры текста, не ловишь фейки, не споришь с «ботами-оракулами». Просто выбираешь предложение, которое реально в тему — или пролистываешь дальше. Иногда лучший выбор — пролистать.
Сохрани ссылку. Когда захочешь добавить немного «топлива» к сессии, не придётся искать с нуля.
https://t.me/s/kazino_s_minimalnym_depozitom
repaglinide floating tablets
https://t.me/s/Portable_Cryptoboss
https://t.me/s/DragonMoney_Portable
https://t.me/R2T_7k/9479
https://t.me/s/Casino_1win_1win_1win
acheter viagra viagra en ligne
https://t.me/s/TeleCasino_1win/3167
https://t.me/s/TeleCasino_1Win/5
viagra livraison rapide acheter viagra france
https://t.me/s/play_1win_online
https://t.me/s/Casino_top2
https://t.me/s/a_official_1win
https://t.me/s/Best_promocode_rus
https://t.me/s/kazino_s_minimalnym_depozitom
Проверенный канал 1win https://t.me/s/casino1win_rus
is remeron a benzodiazepine
https://t.me/s/lev_official_lev
1 win
https://t.me/vavada_win_vavada/142
https://t.me/s/Portable_Tusk
https://t.me/DragonMoney_Portable/4518
https://t.me/s/OcCasinoTop/40
https://t.me/R2T_7k/9479
https://t.me/s/Casino_1win_1win_1win
https://vk.com/wall-231374912_50
https://t.me/s/TOPCasiNO_pORtABle
1Win — онлайн-казино с широкой линейкой игровых автоматов, живыми дилерами и ставками на спорт. Платформа предлагает высокие коэффициенты, бонусы и акции для игроков. Простота регистрации, быстрая поддержка и удобный интерфейс делают игровой опыт комфортным. Однако важно помнить о рисках азартных игр и играть ответственно.
https://t.me/Mobile_1win/108
https://t.me/s/TopTgCasino2025
Ищешь лучшие места для ставок с минимальными рисками? Мы покопались в мире азартных игр и подготовили для тебя Топ 15 надежных онлайн-казинo с минимальными ставками! Каждое из этих казинo имеет лицензию, так что можешь смело играть, не беспокоясь о безопасности.
https://t.me/s/rejting_top_luchshih_kazino/233
https://t.me/cVavada_vavada
viagra livraison rapide acheter viagra
viagra sans ordonnance en ligne viagra sans ordonnance en ligne
https://t.me/s/TeleCasino_1x
https://t.me/s/TeleCasino_1Win/957148
https://telegra.ph/Top-10-chestnyh-kazino-s-bystrymi-vyplatami-rejting-luchshih-08-01
Тебе интересны щедрые #бонусы, выгодные #акции и актуальные #промокоды для #1Win (#1Вин)? Тогда присоединяйтесь на наш Telegram-канал Web_1win!
У нас вы обнаружите:
Актуальные #зеркало для #войти на официальный сайт #1Вин. Больше блокировок и проблем с доступом!
Информация о самых выгодных #играх и #казино. Рейтинги, стратегии и подсказки чтобы максимизации твоих шансов на выигрыш.
Подробные инструкции по #регистрации и старту игры. Легкий старт для начинающих.
Анонсы о #турнирах с большими призовыми фондами. Присоединяйтесь и побеждайте!
Советы по #безопасности вашего аккаунта и средств. Мы заботимся о вашей сохранности.
Отзывы о #мобильный приложении #1Вин. Играйте где захотите и когда угодно!
Честные #отзывы клиентов о #1Вин. Посмотрите, что думают другие!
Подписывайтесь прямо сейчас и не упустите шанс получить доступ к вселенной успеха и развлечений с #1Win! Переходите: официальный сайт 1вин
https://t.me/s/Web_1win
https://t.me/s/onewin_kanal/11525
https://t.me/s/onewin_kanal/11160
https://t.me/s/TgWin_1win/1304
https://t.me/s/Casino_top2
https://t.me/s/Officiall_1win_ru
//t.me/s/official_1win_aviator](https://t.me/s/official_1win_aviator)
https://t.me/s/ef_beef
https://t.me/s/ef_beef
https://t.me/s/official_pokerdom_pokerdom
https://t.me/s/officials_casino_1win
https://t.me/s/mcasino_martin/614
https://t.me/officials_dragonmoney/4
https://t.me/s/EF_beef
https://t.me/s/it_martIn_caSINo
http://maps.google.com.mx/url?q=https://t.me/s/officials_7k/515
https://clients1.google.com.nf/url?q=https://t.me/s/oFFiciaLS_7k_CaSINO
https://t.me/s/kazino_s_minimalnym_depozitom
https://t.me/s/it_ezcash
https://t.me/ta_1win/884
https://t.me/s/kazino_s_minimalnyM_DEPOziToM
https://t.me/s/top_onlajn_kazino_rossii
https://groups.google.com/u/5/g/topcasino_rus/c/k4CgRVc5d24
https://t.me/s/prodvizhenie_telegram_v_top
is protonix over the counter
https://t.me/s/Portable_CryptoGames
https://t.me/sDragonMoney_Portable
https://t.me/R2T_7k/9479
https://t.me/s/Casino_1win_1win_1win
1Win — онлайн-казино с широкой линейкой игровых автоматов, живыми дилерами и ставками на спорт. Платформа предлагает высокие коэффициенты, бонусы и акции для игроков. Простота регистрации, быстрая поддержка и удобный интерфейс делают игровой опыт комфортным. Однако важно помнить о рисках азартных игр и играть ответственно.
https://t.me/s/TopTg_1win
https://t.me/s/TeleCasino_1win/763
https://t.me/TeleCasino_1Win/5
https://t.me/s/play_1win_online
https://t.me/s/Casino_top2
https://t.me/s/official_1_winn
https://t.me/s/kazino_s_minimalnym_depozitom
https://t.me/s/prodvizhenie_telegram_v_top
robaxin a controlled substance
https://t.me/s/vavada_official_vavada
viagra livraison rapide viagra en ligne
https://t.me/s/kazino_s_minimalnym_depozitom
does remeron help with anxiety
https://t.me/s/vavada_official_vavada
https://t.me/Martin_Casino_TG/408
https://t.me/s/Official_1xbet_1xbet
https://t.me/s/top_kazino5/395
https://t.me/s/kazino_s_minimalnym_depozitom
https://t.me/besplatnaya_parkovka_avto/10
robaxin and percocet high
https://t.me/s/Portable_Bitkoin
https://t.me/s/DragonMoney_Portable
https://t.me/s/Official_Casino1win
https://t.me/R2T_7k/9479
https://t.me/s/Casino_1win_1win_1win
https://t.me/Official_1xbet_1xbet
https://t.me/s/top_kazino5/618
https://t.me/s/kazino_s_minimalnym_depozitom
protonix 20 mg
https://t.me/s/vavada_official_vavada
https://t.me/s/kazino_s_minimalnym_depozitom
Сравнение бонусов на первый депозит
казино быстрый вывод
snort robaxin
https://t.me/s/vavada_win_vavada/534
https://t.me/s/Portable_Cadoola
https://t.me/s/DragonMoney_Portable
https://t.me/R2T_7k/9479
https://t.me/s/Casino_1win_1win_1win
https://t.me/s/TeleCasino_1win/3247
https://t.me/s/TeleCasino_1Win/3
https://t.me/s/play_1win_online
https://t.me/s/Official_1xbet_1xbet
https://t.me/s/a_official_1win
промокоды казино без мусора — один канал, где всё по делу
Не люблю охоту за «рабочими кодами» по шумным чатам. Хочется нажать — и видеть: что дают, куда вводить, до какого времени. Без квестов, без капса, без «срочно успей».
Держу под рукой один источник: https://t.me/s/Best_promocode_rus
В ленте — короткие карточки: промо на слоты, live, crash; пометка «актуально сегодня»; сразу видно, есть ли фриспины или бонус к депозиту. Никаких загадок. Открыл, посмотрел, решил — подходить ли под твой план на вечер.
Почему это удобно? Потому что экономит внимание. Ты не читаешь километры текста, не ловишь фейки, не споришь с «ботами-оракулами». Просто выбираешь предложение, которое реально в тему — или пролистываешь дальше. Иногда лучший выбор — пролистать.
Сохрани ссылку. Когда захочешь добавить немного «топлива» к сессии, не придётся искать с нуля.
https://t.me/s/kazino_s_minimalnym_depozitom
repaglinide rxlist
https://t.me/s/Portable_TrustDice
https://t.me/vavada_win_vavada/423
https://t.me/s/Portable_BetOBet
https://t.me/sDragonMoney_Portable
https://t.me/s/RatingCasinoRu
https://t.me/R2T_7k/9479
Множество игроков стремятся найти надежные казино, но как выбрать среди множества предложений? В поисках идеального онлайн-заведения можно легко запутаться, ведь на рынке появляется все больше новых сайтов. Однако что важно для игроков при выборе? Конечно, репутация и честность!
Основной критерий оценки — это доверие игроков. Именно на основе их опыта мы и строим рейтинг казино. Для того чтобы попасть в топ казино, онлайн-казино должны соответствовать ключевым ожиданиям пользователей: быстрые выплаты, удобный интерфейс, разнообразие игр и защита персональных данных.
Давайте порассуждаем! Многие игроки обращают внимание на отзывы, и это не просто так. За годы работы и игры на реальных деньгах люди научились отличать качественные казино от посредственных. На что стоит смотреть в первую очередь? Репутация, конечно. Если казино долго работает на рынке, с положительными отзывами и без негативных случаев, то это отличный признак.
Кроме того, настоящие профессионалы всегда ищут казино с лицензией. Без неё играть можно, но зачем рисковать? Лицензированные сайты обеспечивают дополнительную безопасность и гарантии для игроков. А вот бонусные программы и акции — важный фактор, который привлекает внимание, но всегда помните: чем выше бонус, тем сложнее его отыграть.
Не стоит забывать и о мобильных версиях казино. Ведь куда удобнее, когда все под рукой, и можно сыграть в любимые игры даже на ходу. А если еще учесть, что многие казино предлагают бесплатные демо-режимы, то это замечательная возможность попробовать удачу без вложений.
Итак, лучшие казино для игры на деньги — это те, которые не только радуют высоким качеством сервиса, но и обеспечивают честность и безопасность. И если вы хотите всегда быть в курсе актуальных новинок, обращайте внимание на оценки игроков и не забывайте о своем мнении!
Завершаем на позитивной ноте! Прежде чем отправиться в новое казино, всегда следите за рейтингом и проверяйте, насколько оно соответствует вашим ожиданиям. Подписывайтесь на надежные казино по версии игроков, чтобы всегда быть в курсе лучших предложений и не пропустить выгодные моменты.
https://t.me/s/Casino_1win_1win_1win
1Win — онлайн-казино с широкой линейкой игровых автоматов, живыми дилерами и ставками на спорт. Платформа предлагает высокие коэффициенты, бонусы и акции для игроков. Простота регистрации, быстрая поддержка и удобный интерфейс делают игровой опыт комфортным. Однако важно помнить о рисках азартных игр и играть ответственно.
https://t.me/s/mobile_1win/726
https://t.me/cVavada_vavada
https://t.me/s/TeleCasino_1Win/950858
https://telegra.ph/TOP-10-onlajn-kazino-s-minimalnymi-stavkami-08-01
https://t.me/s/play_1win_online
https://t.me/s/Casino_top2
https://t.me/s/official_1_winn
https://t.me/s/ef_beef
https://t.me/officials_dragonmoney/9
https://t.me/s/EF_BEEF
https://t.me/s/it_marTIn_CASIno
https://maps.google.com.py/url?q=https://t.me/s/oFfIcIals_7k_CAsInO
https://t.me/s/kazino_s_minimalnym_depozitom
https://t.me/s/russia_casINO_1wiN
https://s/t.me/s/tx_1win/587
https://t.me/s/top_onlajn_kazino_rossii
https://t.me/s/prodvizhenie_telegram_v_top
Лучшие условия для ставок
казино с быстрыми выплатами
После того как я купил защитные очки от лазерного излучения, я понял, что это необходимо для обеспечения безопасности при работе с лазерами. Мои глаза теперь защищены, и я могу спокойно выполнять свою работу, не беспокоясь о возможных рисках.
https://t.me/vavada_win_vavada/253
https://t.me/s/Portable_Metatokens
https://t.me/sDragonMoney_Portable
https://t.me/s/RatingCasinoRu
https://t.me/R2T_7k/9479
https://t.me/s/Casino_1win_1win_1win
1Win — онлайн-казино с широкой линейкой игровых автоматов, живыми дилерами и ставками на спорт. Платформа предлагает высокие коэффициенты, бонусы и акции для игроков. Простота регистрации, быстрая поддержка и удобный интерфейс делают игровой опыт комфортным. Однако важно помнить о рисках азартных игр и играть ответственно.
https://t.me/s/sd1win
https://t.me/s/TeleCasino_1win/1433
https://t.me/TeleCasino_1Win/5
https://t.me/s/play_1win_online
https://t.me/s/top_casino_rating_igrat
https://t.me/s/official_1_winn
https://t.me/s/Best_promocode_rus/2655
http://hydraulic-balance.com/bitrix/rk.php?goto=https://t.me/s/oFFiCIaLS_7k_casINO
https://t.me/s/kazino_s_minimalnym_depozitom
https://t.me/s/russia_caSInO_1Win
https://t.me/s/prodvizhenie_telegram_v_top
Турниры с большими призовыми
казино в мобильном приложении
remeron dose
https://t.me/vavada_win_vavada/285
https://t.me/s/Portable_Shot
https://t.me/sDragonMoney_Portable
https://t.me/R2T_7k/9479
https://t.me/s/Casino_1win_1win_1win
https://t.me/s/TeleCasino_1win/1583
https://t.me/TeleCasino_1Win/3
https://t.me/s/play_1win_online
https://t.me/top_casino_rating_igrat
https://t.me/s/official_1_winn
http://svetoformagazin.ru/go.php?url=https://t.me/s/oFfICials_7K_casIno
https://t.me/s/kazino_s_minimalnym_depozitom
https://t.me/s/russIa_casINo_1wiN
https://t.me/s/officlal_1win
https://t.me/s/prodvizhenie_telegram_v_top
repaglinide transporter
https://t.me/s/vavada_official_vavada
https://t.me/s/Official_1xbet_1xbet
https://t.me/s/top_kazino5/497
https://t.me/s/kazino_s_minimalnym_depozitom
казино Atom официальный Telegram канал https://t.me/s/Atom_official_rus
Крупные выигрыши
рейтинг бездепозитные казино
synthroid insurance
https://t.me/s/Portable_Sandbox
https://t.me/s/DragonMoney_Portable
https://t.me/R2T_7k/9479
https://t.me/s/Casino_1win_1win_1win
https://t.me/Martin_Casino_TG/709
https://t.me/s/Official_casino_1win_1win
https://t.me/TeleCasino_1Win
https://t.me/s/Official_1xbet_1xbet
https://t.me/s/top_kazino5/551
https://t.me/s/kazino_s_minimalnym_depozitom
synthroid actonel
https://t.me/s/Portable_JettonGames
https://t.me/s/DragonMoney_Portable
https://t.me/s/Official_Casino1win
https://t.me/R2T_7k/9479
https://t.me/Martin_Casino_TG/351
https://t.me/s/Official_1xbet_1xbet
https://t.me/s/top_kazino5/432
https://t.me/s/Monro_officials
https://t.me/s/kazino_s_minimalnym_depozitom
Лицензионный софт от Microgaming
казино в интернете
molecular weight of sitagliptin
https://t.me/s/Portable_yoyo
https://t.me/vavada_win_vavada/398
https://t.me/s/Portable_Konung
https://t.me/sDragonMoney_Portable
https://t.me/s/RatingCasinoRu
https://t.me/R2T_7k/9479
https://t.me/s/Casino_1win_1win_1win
1Win — онлайн-казино с широкой линейкой игровых автоматов, живыми дилерами и ставками на спорт. Платформа предлагает высокие коэффициенты, бонусы и акции для игроков. Простота регистрации, быстрая поддержка и удобный интерфейс делают игровой опыт комфортным. Однако важно помнить о рисках азартных игр и играть ответственно.
https://t.me/s/mobile_1win/746
https://t.me/s/TeleCasino_1win/1373
https://t.me/s/TeleCasino_1Win/901028
https://telegra.ph/Top-10-onlajn-kazino-dlya-igrokov-v-Rossii-Ne-propusti-shans-vyigrat-08-01
https://t.me/s/play_1win_online
https://t.me/s/top_casino_rating_igrat
https://t.me/s/official_1_winn
https://t.me/s/EF_BEEF
https://maps.google.tn/url?sa=t&url=https://t.me/s/offiCiALs_7k_CasiNO
https://t.me/s/kazino_s_minimalnym_depozitom
https://t.me/s/russIa_casiNo_1wiN
https://s/t.me/s/tx_1win/409
https://t.me/s/prodvizhenie_telegram_v_top
Лимиты на суточные выплаты
где играть безопасно
sitagliptin renal dosing
https://t.me/s/vavada_official_vavada
https://t.me/s/kazino_s_minimalnym_depozitom
synthroid alopecia
https://t.me/s/vavada_official_vavada
https://t.me/s/kazino_s_minimalnym_depozitom
Волатильность слотов
задержка выплаты причины
spironolactone brand name
https://t.me/s/Portable_Betson
https://t.me/s/DragonMoney_Portable
https://t.me/R2T_7k/9479
https://t.me/s/Casino_1win_1win_1win
PokerDom: всё об акциях, турнирах и стратегиях! Зеркало, официальный сайт. Скачать приложение и регистрация с промокодом. Вход, отзывы, бездепозитный бонус, мобильное приложение!
https://t.me/s/Top_PokerDom
https://t.me/s/Official_casino_1win_1win
https://t.me/TeleCasino_1Win/6
https://t.me/s/Official_1xbet_1xbet
https://t.me/s/top_kazino5/34
https://t.me/s/kazino_s_minimalnym_depozitom
Надежный сайт
где найти фри бонус
synthroid anorexia
https://t.me/s/vavada_official_vavada
https://t.me/Martin_Casino_TG/83
https://t.me/Official_1xbet_1xbet
https://t.me/s/top_kazino5/645
https://t.me/s/kazino_s_minimalnym_depozitom
Официальный Telegram 1win — канал, где лежит то, что обычно ищут по 10 вкладкам:
промокоды 1win, бонусы 1win, рабочая ссылка / зеркало 1win, обновления приложения 1win, короткие ориентиры по линии и коэффициентам на матчи + апдейты по казино 1win.
Зашёл. Взял. Применил. !+! https://t.me/s/reg_official_1win/45 !+!
Подписка на 1win Telegram — чтобы важное приходило первым, а не “когда уже поздно”.
Экспертное мнение
какие карты принимают
sitagliptin interactions
https://t.me/s/Portable_Unlim
https://t.me/s/DragonMoney_Portable
https://t.me/R2T_7k/9479
https://t.me/s/Casino_1win_1win_1win
https://t.me/Martin_Casino_TG/233
https://t.me/s/Official_casino_1win_1win
https://t.me/TeleCasino_1Win/5
https://t.me/s/Official_1xbet_1xbet
https://t.me/s/top_kazino5/327
https://t.me/s/kazino_s_minimalnym_depozitom
Ищете, какие слоты реально рвали лобби и выдавали главные заносы по итогам 2025 года?
Залетайте в Telegram-канал @igaming_live за честным рейтингом Топ-20 автоматов, где проверенные хиты красиво уделали все новинки!
https://t.me/s/iGaming_live/4901
#слоты #заносы #топслотов #онлайнказино #лучшиеслоты #igaming #казинострим #bigwin #pragmaticplay #hacksawgaming #слоты2025 #азартныеигры #казиноонлайн
spironolactone 100 mg used for
https://t.me/s/Portable_AUF
https://t.me/s/DragonMoney_Portable
https://t.me/R2T_7k/9479
https://t.me/s/Casino_1win_1win_1win
https://t.me/s/Official_casino_1win_1win
https://t.me/TeleCasino_1Win
https://t.me/s/Official_1xbet_1xbet
https://t.me/s/top_kazino5/119
https://t.me/s/kazino_s_minimalnym_depozitom
spironolactone 30 mg
https://t.me/s/Portable_32Red
https://t.me/s/DragonMoney_Portable
https://t.me/R2T_7k/9479
https://t.me/s/Casino_1win_1win_1win
https://t.me/s/Official_casino_1win_1win
https://t.me/s/TeleCasino_1Win/6
https://t.me/s/Official_1xbet_1xbet
https://t.me/s/top_kazino5/118
https://t.me/s/kazino_s_minimalnym_depozitom
Честные обзоры
1GO казино отзывы
synthroid alli
https://t.me/s/vavada_official_vavada
https://t.me/s/kazino_s_minimalnym_depozitom
Сертифицированный софт
на что обратить внимание
tamsulosin o.4mg
https://t.me/s/vavada_official_vavada
https://t.me/s/a_official_1xbet
https://t.me/s/kazino_s_minimalnym_depozitom
otc voltaren
https://t.me/s/DragonMoney_Portable
https://t.me/R2T_7k/9479
https://t.me/s/Casino_1win_1win_1win
https://t.me/s/TeleCasino_1win/4947
https://t.me/TeleCasino_1Win
https://t.me/s/play_1win_online
https://t.me/s/top_casino_rating_igrat
https://t.me/s/top_kazino5
https://t.me/s/kazino_s_minimalnym_depozitom
what does tizanidine do
https://t.me/s/Portable_Bitz
https://t.me/s/DragonMoney_Portable
https://t.me/R2T_7k/9479
https://t.me/Martin_Casino_TG/1021
https://t.me/Official_1xbet_1xbet
https://t.me/s/top_kazino5/375
https://t.me/s/kazino_s_minimalnym_depozitom
Бонусы для новичков
почему есть ограничения
adverse effects for voltaren
https://t.me/s/Portable_Gusar
https://t.me/sDragonMoney_Portable
https://t.me/R2T_7k/9479
https://t.me/s/Casino_1win_1win_1win
1Win — онлайн-казино с широкой линейкой игровых автоматов, живыми дилерами и ставками на спорт. Платформа предлагает высокие коэффициенты, бонусы и акции для игроков. Простота регистрации, быстрая поддержка и удобный интерфейс делают игровой опыт комфортным. Однако важно помнить о рисках азартных игр и играть ответственно.
https://t.me/s/TopTg_1win/70
https://t.me/s/TeleCasino_1win/1373
https://t.me/TeleCasino_1Win/6
https://t.me/s/play_1win_online
https://t.me/s/top_casino_rating_igrat
https://t.me/s/official_1_winn
https://t.me/s/Best_promocode_rus/2970
https://t.me/s/kazino_s_minimalnym_depozitom
Условия кэшбэка 10%
лучшие казино России
what is tizanidine hcl used for
1win betting site
https://t.me/s/Portable_SlottyVegas
1вин
https://t.me/vavada_win_vavada/66
https://t.me/vavada_win_vavada/560
https://t.me/s/Portable_PaddyPower
https://t.me/DragonMoney_Portable/4528
https://t.me/s/OC_Leebet
https://t.me/s/Casino_1win_1win_1win
https://vk.com/wall-231374912_33
1Win — онлайн-казино с широкой линейкой игровых автоматов, живыми дилерами и ставками на спорт. Платформа предлагает высокие коэффициенты, бонусы и акции для игроков. Простота регистрации, быстрая поддержка и удобный интерфейс делают игровой опыт комфортным. Однако важно помнить о рисках азартных игр и играть ответственно.
https://t.me/Mobile_1win/521
Станьте частью клуба победителей вместе с каналом TopTg_1WIN!
Наслаждайтесь лучшими слотами и азартными играми прямо здесь, на нашем официальном Telegram-канале! ЕЖЕДНЕВНЫЕ БОНУСЫ И АКЦИИ ПРИВЕТСТВЕННЫЙ КЭШБЭК ДЛЯ НОВИЧКОВ РАЗДЕЛЕНИЕ ЭКСКЛЮЗИВНЫХ КОДОВ НА ВЫИГРЫШИ
Подключитесь и выигрывайте вместе с нами уже сегодня!
Присоединяйтесь к нашему сообществу прямо сейчас: https://t.me/s/TopTg_1WIN
Ищешь лучшие места для ставок с минимальными рисками? Мы покопались в мире азартных игр и подготовили для тебя Топ 15 надежных онлайн-казинo с минимальными ставками! Каждое из этих казинo имеет лицензию, так что можешь смело играть, не беспокоясь о безопасности.
https://t.me/s/rejting_top_luchshih_kazino/179
https://t.me/cVavada_vavada
https://t.me/s/TeleCasino_7K
https://t.me/s/TeleCasino_1Win
https://telegra.ph/Rejting-10-nadezhnyh-kazino-dlya-igry-na-telefone-08-01
Тебе интересны крупные #бонусы, прибыльные #акции и свежие #промокоды для #1Win (#1Вин)? В таком случае подписывайтесь на наш Telegram-канал Web_1win!
Здесь вы обнаружите:
Рабочие #зеркало для #войти на официальный #1Вин. Больше ограничений и сложностей с доступом!
Данные о самых выгодных #играх и #казино. Рейтинги, стратегии и рекомендации чтобы максимизации ваших шансов на выигрыш.
Детальные инструкции по #регистрации и началу игры. Быстрый старт для начинающих.
Анонсы о #турнирах с крупными выигрышными фондами. Присоединяйтесь и выигрывайте!
Советы по #безопасности вашего аккаунта и средств. Наша команда заботимся о вашей защите.
Отзывы о #мобильный приложении #1Вин. Наслаждайтесь игрой где захотите и когда захотите!
Честные #отзывы клиентов о #1Вин. Узнайте, что говорят другие!
Подписывайтесь прямо сейчас и не упустите шанс получить ключ к вселенной выгод и азарта с #1Win! Ссылка: 1вин официальный сайт
https://t.me/s/Web_1win
https://t.me/s/Webs_1WIN/258
https://t.me/s/onewin_kanal/9180
https://t.me/s/onewin_kanal/14085
https://t.me/s/TgWin_1win
https://t.me/s/toplist_casino
https://t.me/top_casino_rating_igrat
https://t.me/s/Officiall_1win_ru
//t.me/s/official_1win_aviator](https://t.me/s/official_1win_aviator)
https://t.me/s/ef_beef
https://t.me/s/ef_beef
https://t.me/s/official_pokerdom_pokerdom
https://t.me/s/xbet_official_1xbet
https://t.me/s/officials_casino_1win
https://t.me/s/mcasino_martin/718
https://t.me/officials_dragonmoney/9
https://t.me/s/EF_beef
https://t.me/s/kazino_s_minimalnym_depozitom
https://t.me/s/it_marTIN_cASINO
https://t.me/s/Officials_7K_casino
https://maps.google.ki/url?q=https://t.me/s/OFFICIalS_7k_caSino
https://t.me/s/kazino_s_minimalnym_depozitom
https://t.me/s/it_ezcash
https://t.me/s/ta_1win/1255
https://t.me/s/kazino_s_minimalnYm_DepOZItOM
https://t.me/s/kazino_s_minimAlNyM_DEPOzItom
https://t.me/s/officlal_1win
https://groups.google.com/u/5/g/topcasino_rus/c/k4CgRVc5d24
https://t.me/s/prodvizhenie_telegram_v_top
Рейтинг по выплатам
карты кошельки переводы
venlafaxine for hot flashes
https://t.me/s/Portable_Live
https://t.me/vavada_win_vavada/302
https://t.me/s/Portable_JettonGames
https://t.me/sDragonMoney_Portable
https://t.me/R2T_7k/9479
https://t.me/s/Casino_1win_1win_1win
https://vk.com/wall-231374912_65
1Win — онлайн-казино с широкой линейкой игровых автоматов, живыми дилерами и ставками на спорт. Платформа предлагает высокие коэффициенты, бонусы и акции для игроков. Простота регистрации, быстрая поддержка и удобный интерфейс делают игровой опыт комфортным. Однако важно помнить о рисках азартных игр и играть ответственно.
https://t.me/s/mobile_1win/806
https://t.me/cVavada_vavada
https://t.me/s/TeleCasino_1Win/954358
https://telegra.ph/Top-chestnyh-onlajn-kazino-s-vysokoj-otdachej-08-01
https://t.me/s/Webs_1win/202
https://t.me/s/Topchik_1WIN
https://t.me/s/Casino_top2
https://t.me/s/official_1_winn
лучший русскоязычный телеграм канал с промокодами казино и актуальными осенними бонусами 2025!
https://t.me/Best_promocode_rus/2401/ethereum_казино_промокод
Промокоды казино 2025: свежие бонус-коды, фриспины и бездепозитные предложения. Публикуем проверенные купоны и инструкции по активации. Подписывайтесь для ежедневных обновлений!
https://t.me/s/official_pokerdom_pokerdom
https://t.me/officials_dragonmoney/7
https://t.me/s/EF_BEEF
https://t.me/s/it_martIn_CaSINo
http://www.meetthegreens.org/cgi-registry/bridgepop.pl?url=https://t.me/s/OfFicIaLS_7k_CasiNo
https://t.me/s/kazino_s_minimalnym_depozitom
https://t.me/s/it_ezcash
https://t.me/s/russia_casino_1WIn
https://s/t.me/s/tx_1win/427
https://t.me/s/top_onlajn_kazino_rossii
https://t.me/s/prodvizhenie_telegram_v_top
Мгновенный вывод средств
карты кошельки переводы
venlafaxine sleepy
https://t.me/s/Portable_LTC
https://t.me/vavada_win_vavada/245
https://t.me/s/Portable_Pobeda
https://t.me/sDragonMoney_Portable
https://t.me/R2T_7k/9479
https://t.me/s/Casino_1win_1win_1win
https://vk.com/wall-231374912_65
1Win — онлайн-казино с широкой линейкой игровых автоматов, живыми дилерами и ставками на спорт. Платформа предлагает высокие коэффициенты, бонусы и акции для игроков. Простота регистрации, быстрая поддержка и удобный интерфейс делают игровой опыт комфортным. Однако важно помнить о рисках азартных игр и играть ответственно.
https://t.me/s/mobile_1win/416
https://t.me/cVavada_vavada
https://t.me/s/TeleCasino_1Win/904188
https://telegra.ph/Top-10-nadezhnyh-kazino-dlya-igrokov-v-Rossii-08-01
https://t.me/s/TgWin_1win/1554
https://t.me/s/top_casino_rating_igrat
https://t.me/s/official_1_winn
https://t.me/s/official_pokerdom_pokerdom
https://t.me/officials_dragonmoney/11
https://t.me/s/EF_BEEF
https://t.me/s/it_marTIN_CaSino
https://topol-dt.ru/bitrix/redirect.php?goto=https://t.me/s/OffICiAls_7K_casinO
https://t.me/s/kazino_s_minimalnym_depozitom
https://t.me/s/it_ezcash
https://t.me/s/russiA_casiNO_1wiN
https://s/t.me/s/tx_1win/581
https://t.me/s/top_onlajn_kazino_rossii
https://t.me/s/officlal_1win
https://t.me/s/prodvizhenie_telegram_v_top
tongue sores and voltaren
промокод для 1win
https://t.me/s/Portable_BetOBet
1 вин
https://t.me/vavada_win_vavada/543
https://t.me/s/Portable_Bitz
https://t.me/DragonMoney_Portable/4470
https://t.me/s/OcCasinoTop/37
https://t.me/R2T_7k/9479
Хотите наслаждаться азартом и при этом зарабатывать реальные деньги? Тогда вам точно нужен проверенный рейтинг казино, где выплаты происходят быстро и без задержек. В современном мире онлайн-казино уже давно перестали быть просто развлечением — это полноценный источник дохода для тех, кто знает, что делает. Особенно актуально сегодня — играть на реальные деньги с выводом, ведь безопасность и честность игр стали приоритетами для игроков по всей России.
Основной критерий, по которому мы оцениваем лучшие казино — это надежность. Тут важна не только щедрая бонусная политика или разнообразие игр, но и возможность легально вывести выигрыш на карту или электронный кошелек без лишних заморочек. Когда выбираешь сайт для игры на деньги, хочешь быть уверенным, что твои деньги в безопасности, а процесс вывода — гладкий и прозрачный. Ни один игрок не хочет тратить часы или дни, чтобы получить свои выигранные деньги.
Об этом рынке можно рассказывать бесконечно. Например, многие отмечают, что в лучших казино гарантирован быстрый вывод средств — зачастую в течение нескольких минут или часов после подачи заявки. А при этом создание аккаунта — просто, а вывод можно осуществлять с помощью популярных способов: банковские карты, электронные кошельки или даже криптовалюты. Не секрет, что именно такие нюансы делают игру более приятной: ничего не мешает насладиться процессом и чувствовать уверенность в своих финансах.
Конечно, не все так гладко. На рынке много недобросовестных сайтов, которые обещают “лучшие выплаты” и “безопасную игру”, а по итогу скрывают сроки вывода или требуют дополнительных платежей. Например, есть онлайн-казино с лицензией, которая вызывает доверие, и сайты, которые просто имитируют честность. Именно поэтому в топ казино всегда входит проверка лицензий, репутации и отзывов других игроков. Там, где есть отзывы о стабильных выплатах и честных условиях, — вы точно найдете надежное место для игры на деньги с выводом.
Наш совет — выбирайте только лучшие казино, которые мы регулярно обновляем в рейтинге. Не гоняйтесь за “супер-бонусами” с кабальными условиями, а лучше обращайте внимание на реальные отзывы и лицензии. Играть на реальные деньги с выводом — это не только про шанс выиграть, но и про доверие к выбранному сайту. Чем больше у вас уверенности, тем спокойнее проводить время в любимых слотах или румах.
Хотите всегда быть в курсе свежих новинок и проверенных сайтов? Тогда обязательно подписывайтесь на наш канал Текст. Мы подобрали для вас только лучшие и проверенные казино, где можно играть на деньги с выводом и чувствовать себя защищенным. Сделайте правильный выбор сегодня, и вперед к победам! Помните, удача любит подготовленных.
https://t.me/s/Casino_1win_1win_1win
https://vk.com/wall-231374912_56
1Win — онлайн-казино с широкой линейкой игровых автоматов, живыми дилерами и ставками на спорт. Платформа предлагает высокие коэффициенты, бонусы и акции для игроков. Простота регистрации, быстрая поддержка и удобный интерфейс делают игровой опыт комфортным. Однако важно помнить о рисках азартных игр и играть ответственно.
https://t.me/Mobile_1win/845
https://t.me/s/TopTgCasino2025
Ищешь лучшие места для ставок с минимальными рисками? Мы покопались в мире азартных игр и подготовили для тебя Топ 15 надежных онлайн-казинo с минимальными ставками! Каждое из этих казинo имеет лицензию, так что можешь смело играть, не беспокоясь о безопасности.
https://t.me/s/rejting_top_luchshih_kazino/213
https://t.me/cVavada_vavada
https://t.me/s/TeleCasino_7K
https://t.me/s/TeleCasino_1Win/976208
https://telegra.ph/Top-10-Kazino-s-Molnienosnymi-Vyplatami-08-01
Тебе интересны щедрые #бонусы, прибыльные #акции и актуальные #промокоды для #1Win (#1Вин)? Тогда подписывайтесь на наш Telegram-канал Web_1win!
У нас вы обнаружите:
Свежие #зеркало чтобы #войти на официальный сайт #1Вин. Больше ограничений и проблем с доступом!
Информация о самых выгодных #играх и #казино. Рейтинги, советы и рекомендации чтобы максимизации твоих шансов на выигрыш.
Подробные инструкции по #регистрации и началу игры. Легкий старт для начинающих.
Анонсы о #турнирах с большими выигрышными фондами. Присоединяйтесь и выигрывайте!
Рекомендации по #безопасности вашего аккаунта и средств. Мы заботимся о твоей сохранности.
Обзоры о #мобильный приложении #1Вин. Играйте где угодно и когда захотите!
Реальные #отзывы клиентов о #1Вин. Посмотрите, что думают другие!
Подписывайтесь прямо сейчас и получите доступ к вселенной успеха и развлечений с #1Win! Переходите: 1 1win зеркало
https://t.me/s/Web_1win
https://t.me/s/onewin_kanal/11335
https://t.me/s/onewin_kanal/8990
https://t.me/s/TgWin_1win/1274
https://t.me/top_casino_rating_igrat
https://t.me/s/Officiall_1win_ru
//t.me/s/official_1win_aviator](https://t.me/s/official_1win_aviator)
https://t.me/s/ef_beef
https://t.me/s/ef_beef
https://t.me/s/official_pokerdom_pokerdom
https://t.me/mcasino_martin/374
https://t.me/s/officials_dragonmoney/5
https://t.me/s/EF_beef
https://t.me/s/it_martIn_casIno
http://maps.google.com.mx/url?q=https://t.me/officials_7k/809
https://99.torayche.com/index/d1?diff=0&utm_source=og&utm_campaign=20924&utm_content=&utm_clickid=https://t.me/s/OfFIcIALs_7k_CASiNO
https://t.me/s/kazino_s_minimalnym_depozitom
https://t.me/s/it_ezcash
https://t.me/ta_1win/1078
https://t.me/s/kazino_s_minimalnyM_DEPoZitOm
https://t.me/s/top_onlajn_kazino_rossii
https://t.me/s/officlal_1win
https://groups.google.com/u/5/g/topcasino_rus/c/k4CgRVc5d24
https://t.me/s/prodvizhenie_telegram_v_top
Конфиденциальность данных
процент комиссии
how long does tizanidine stay in your urine
1win казино с минимальными ставками
https://t.me/s/Portable_MrGreen
1 вин
https://t.me/vavada_win_vavada/446
https://t.me/s/POrtable_Oxi
https://t.me/sDragonMoney_Portable
https://t.me/s/OC_Weiss
https://t.me/s/OcCasinoTop/39
https://t.me/R2T_7k/9479
https://t.me/s/Casino_1win_1win_1win
https://vk.com/wall-231374912_64
1Win — онлайн-казино с широкой линейкой игровых автоматов, живыми дилерами и ставками на спорт. Платформа предлагает высокие коэффициенты, бонусы и акции для игроков. Простота регистрации, быстрая поддержка и удобный интерфейс делают игровой опыт комфортным. Однако важно помнить о рисках азартных игр и играть ответственно.
https://t.me/Mobile_1win/944
https://t.me/s/TopTg_1Win
https://t.me/cVavada_vavada
https://t.me/s/TeleCasino_7K
https://t.me/s/TeleCasino_1Win/931728
https://telegra.ph/Top-5-chestnyh-onlajn-kazino-v-Rossii-rejting-dlya-igrokov-08-01
https://t.me/s/Web_1win
https://t.me/s/official_1win_site_2025/17
https://t.me/s/Official_1win_official_1win/1019
https://t.me/s/top_casino_rating_igrat
https://t.me/s/Officiall_1win_ru
https://t.me/s/official_1win_aviator
https://t.me/s/ef_beef
https://t.me/s/official_pokerdom_pokerdom
https://t.me/s/mcasino_martin/721
https://t.me/officials_dragonmoney/5
https://t.me/s/EF_beef
https://t.me/s/it_martiN_CaSINo
http://images.google.td/url?q=https://t.me/s/OFFICIALs_7K_cASinO
https://t.me/s/kazino_s_minimalnym_depozitom
https://t.me/s/it_ezcash
https://t.me/ta_1win/1091
https://s/t.me/s/tx_1win/137
https://t.me/s/top_onlajn_kazino_rossii
https://t.me/s/officlal_1win
https://groups.google.com/u/5/g/topcasino_rus/c/k4CgRVc5d24
https://t.me/s/prodvizhenie_telegram_v_top
voltaren gel and oral naproxen
https://t.me/s/vavada_official_vavada
https://t.me/Official_1xbet_1xbet
https://t.me/s/top_kazino5/544
https://t.me/s/kazino_s_minimalnym_depozitom
казино Atom официальный Telegram канал https://t.me/s/Atom_official_rus
withdrawal symptoms of zyprexa
https://t.me/s/vavada_official_vavada
https://t.me/s/kazino_s_minimalnym_depozitom
zetia dose
https://t.me/s/Portable_Mostbet
https://t.me/sDragonMoney_Portable
https://t.me/R2T_7k/9479
https://t.me/s/Casino_1win_1win_1win
1Win — онлайн-казино с широкой линейкой игровых автоматов, живыми дилерами и ставками на спорт. Платформа предлагает высокие коэффициенты, бонусы и акции для игроков. Простота регистрации, быстрая поддержка и удобный интерфейс делают игровой опыт комфортным. Однако важно помнить о рисках азартных игр и играть ответственно.
https://t.me/s/TopTg_1win
https://t.me/s/TeleCasino_1win/1663
https://t.me/s/TeleCasino_1Win/5
https://t.me/s/play_1win_online
https://t.me/s/top_casino_rating_igrat
https://t.me/s/official_1_winn
https://t.me/s/Best_promocode_rus/3125
https://hc.kvmgalore.com/proxy.php?link=https://t.me/s/offICIAlS_7K_CasiNO
https://t.me/s/kazino_s_minimalnym_depozitom
https://t.me/s/russia_CASiNo_1win
https://t.me/s/prodvizhenie_telegram_v_top
Отзывы реальных игроков
проблемы с выплатой
zyprexa dopamine
https://t.me/sDragonMoney_Portable
https://t.me/s/TeleCasino_1win/1203
https://t.me/s/TeleCasino_1Win
https://t.me/s/top_casino_rating_igrat
https://toolbarqueries.google.com.tw/url?q=https://t.me/s/oFFICiALs_7k_cASinO
zofran use in infants
https://t.me/s/Portable_SlottyVegas
https://t.me/s/vavada_win_vavada
https://t.me/vavada_win_vavada/147
https://t.me/s/Portable_SlottyVegas
https://t.me/sDragonMoney_Portable
https://t.me/yfy_1win_2/3
https://t.me/s/Casino_1win_1win_1win
1Win — онлайн-казино с широкой линейкой игровых автоматов, живыми дилерами и ставками на спорт. Платформа предлагает высокие коэффициенты, бонусы и акции для игроков. Простота регистрации, быстрая поддержка и удобный интерфейс делают игровой опыт комфортным. Однако важно помнить о рисках азартных игр и играть ответственно.
https://t.me/s/mobile_1win/666
https://t.me/s/TeleCasino_1win/1623
https://t.me/s/TeleCasino_1Win
https://telegra.ph/Rejting-5-luchshih-onlajn-kazino-s-minimalnymi-stavkami-08-01
https://t.me/s/Official_1xbet_1xbet/860
https://t.me/s/play_1win_online
https://t.me/s/Casino_top2
https://t.me/s/official_1_winn
https://t.me/s/EF_BEEF
https://cse.google.com.do/url?q=https://t.me/s/offICIAls_7K_CaSiNO
https://t.me/s/kazino_s_minimalnym_depozitom
https://t.me/s/russIa_caSINO_1win
https://s/t.me/s/tx_1win/495
https://t.me/s/officlal_1win
https://t.me/s/prodvizhenie_telegram_v_top
when does wellbutrin go generic
https://t.me/s/Portable_BetOBet
1win
https://t.me/vavada_win_vavada/423
https://t.me/s/Portable_Kometa
https://t.me/sDragonMoney_Portable
https://t.me/s/OcCasinoTop/40
https://t.me/R2T_7k/9479
https://t.me/s/Casino_1win_1win_1win
https://vk.com/wall-231374912_65
1Win — онлайн-казино с широкой линейкой игровых автоматов, живыми дилерами и ставками на спорт. Платформа предлагает высокие коэффициенты, бонусы и акции для игроков. Простота регистрации, быстрая поддержка и удобный интерфейс делают игровой опыт комфортным. Однако важно помнить о рисках азартных игр и играть ответственно.
https://t.me/s/mobile_1win/206
https://t.me/cVavada_vavada
https://t.me/s/TeleCasino_1Win/954838
https://telegra.ph/Top-10-nadezhnyh-onlajn-kazino-s-horoshej-otdachej-08-01
https://t.me/s/Webs_1win/194
https://t.me/s/Official_1win_official_1win/267
https://t.me/s/top_casino_rating_igrat
https://t.me/s/official_1_winn
лучший русскоязычный телеграм канал с промокодами казино и актуальными осенними бонусами 2025!
https://t.me/Best_promocode_rus/2755/можно_ли_отменить_бонус
Промокоды казино 2025: свежие бонус-коды, фриспины и бездепозитные предложения. Публикуем проверенные купоны и инструкции по активации. Подписывайтесь для ежедневных обновлений!
https://t.me/s/official_pokerdom_pokerdom
https://t.me/officials_dragonmoney/4
https://t.me/s/EF_BEEF
https://t.me/s/it_marTIn_CasInO
https://pastis.org/jade/cgi-bin/reframe.pl?http://lcat.Ac.th/index.php?name=webboard&file=read&id=https://t.me/s/officiALs_7K_casINo
https://t.me/s/kazino_s_minimalnym_depozitom
https://t.me/s/it_ezcash
https://t.me/s/russiA_cASINo_1WIn
https://t.me/s/top_onlajn_kazino_rossii
https://t.me/s/officlal_1win
https://t.me/s/prodvizhenie_telegram_v_top
zofran generic version
1win – будь в плюсе!
https://t.me/s/Portable_Betway
1 win
https://t.me/vavada_win_vavada/141
https://t.me/s/Portable_PartyPoker
https://t.me/s/OC_RoySpins
Выбирая казино для игры на деньги, многие сталкиваются с проблемой: как выбрать надежное место для ставок? В интернете множество вариантов, но как понять, кто из них действительно стоит вашего внимания?
Главный критерий выбора — это надежность. Надежные казино должны предоставлять честные игры, гарантировать безопасность ваших данных и выплат. Но, конечно, на этом список критериев не заканчивается.
Давайте поразмышляем о том, что же нужно учитывать при выборе казино. Прежде всего, это безопасность. Проверенные казино всегда используют современные технологии шифрования для защиты ваших личных данных. Чем выше уровень безопасности, тем выше вероятность того, что ваше время и деньги не будут потеряны.
Второй момент — это наличие лицензии. Только те казино, которые имеют официальные лицензии от регулирующих органов, могут гарантировать честную игру. Вы не хотите столкнуться с ситуацией, когда вы выигрываете, а казино не выплачивает вам деньги? Лицензия — это первый шаг к проверенному и надежному сервису.
Что еще важно? Конечно, бонусы и акции. Лучшие казино всегда рады приветствовать новых игроков щедрыми предложениями. Однако не забывайте, что бонусы не всегда бывают такими выгодными, как кажутся на первый взгляд. Читайте условия и будьте внимательны!
Процесс вывода средств — еще одна важная часть. Поищите казино с быстрыми выплатами. Задержки в этом процессе могут испортить ваше впечатление от игры. Надежные казино обычно гарантируют минимальные сроки вывода.
Не забывайте и о качестве клиентской поддержки. Важный момент для любого игрока — возможность быстро решить возникшие проблемы. Проверенные казино обеспечивают круглосуточную поддержку и быструю реакцию на запросы пользователей.
Итак, как выбрать топовое казино? Главное — это не спешить и исследовать все доступные отзывы. Наша команда всегда работает для вас, чтобы предоставить самые актуальные и точные данные в мире азартных игр. Для более подробного сравнения казино, а также актуальной информации о лучших и надежных онлайн-казино, подписывайтесь на наш канал сравнение казино.
И помните, что выбирать нужно с умом — всегда проверяйте информацию и не рискуйте без необходимости. Удачи в поисках вашего идеального казино!
Музыка и азарт — комбинация, которая захватывает и не отпускает. Кто из нас не любит под шум песен погружаться в мир ставок и выигрышей? Особенно если речь идет об играем в казино песня — топе развлечений для настоящих любителей риска. Этот жанр — не просто музыка, а целая вселенная эмоций, драйва и адреналина. Самое время понять, как правильно выбрать надежные казино, чтобы играть без опасений и получать максимум удовольствия. В этом топе мы расскажем о критериях, по которым оцениваем лучшие казино для игры на деньги и как выбрать сайт, где каждый раунд — как хит на сцене.
Главный критерий — это безопасность и честность платформы. Надежные казино используют лицензию, проверенные платежные системы и современные технологии шифрования. Почему это важно? Чтобы ваши деньги и личные данные были под надежной защитой, а результат игры оставался абсолютно честным. Не стоит доверять сомнительным сайтам с черной репутацией и отсутствием лицензии — это как играть с фальшивой пластинкой, рискуя застрять в проигрышах.
Обзор топ казино показывает, что лучшие площадки отличаются не только надежностью, но и богатым выбором игр. В них есть всё: яркие слоты с музыкальными мотивами, рулетки, карточные игры и свежие новинки, которые появляются буквально каждые пару дней. Такая многообразность — залог того, что каждый найдет свою любимую песню и свой способ выиграть. К примеру, одни игроки предпочитают классические слоты, а кто-то любит экспериментировать с новыми тематическими автоматами — и все это есть у топовых казино.
Почему люди любят играть именно под любимые песни? Потому что музыка создает атмосферу праздника, помогает расслабиться и настроиться на выигрыш. А когда еще и можно сорвать джекпот под любимую мелодию, азарт зашкаливает. Но есть и нюансы: важно быть аккуратными. Не стоит погружаться в азарт до отказа. Надежное казино всегда заботится о вашей ответственности и предлагает лимиты, чтобы игра оставалась приятным развлечением, а не проблемой.
Плюсы играем в казино песня — это возможность подключиться к вечеринке прямо из дома. Онлайн-казино создают атмосферу концерта, где каждый раунд — это новая песня, новый шанс. Единственное, минус — иногда можно потеряться в огромном выборе. Тогда важно ориентироваться по рейтингу казино и отзывам. Рекомендуем присоединиться к официальному каналу ТопРуКазинос — там свежие новости, акции и проверенные площадки.
В итоге, играем в казино песня — это не только про музыку, но и про качество, надежность и удовольствие. Выбирайте лучшие казино по рейтингу, обращайте внимание на лицензию и отзывы. Не забывайте — главное в азартных играх — получать удовольствие и помнить о мере. Не бросайтесь в игру без подготовки — и пусть каждая ставка будет звучать как хит, а не последний аккорд вашей удачи. Подписывайтесь на наш канал — не пропустите лучшие новости и акции! Ведь именно с правильным выбором надежного казино игра превращается в настоящее шоу и источник позитивных эмоций.
https://t.me/s/Casino_1win_1win_1win
https://vk.com/wall-231374912_35
1Win — онлайн-казино с широкой линейкой игровых автоматов, живыми дилерами и ставками на спорт. Платформа предлагает высокие коэффициенты, бонусы и акции для игроков. Простота регистрации, быстрая поддержка и удобный интерфейс делают игровой опыт комфортным. Однако важно помнить о рисках азартных игр и играть ответственно.
https://t.me/Mobile_1win/438
Ищешь лучшие места для ставок с минимальными рисками? Мы покопались в мире азартных игр и подготовили для тебя Топ 15 надежных онлайн-казинo с минимальными ставками! Каждое из этих казинo имеет лицензию, так что можешь смело играть, не беспокоясь о безопасности.
https://t.me/s/rejting_top_luchshih_kazino/189
https://t.me/cVavada_vavada
https://t.me/s/TeleCasino_1x
https://t.me/s/TeleCasino_1Win/917748
https://telegra.ph/Top-10-nadezhnyh-kazino-dlya-igry-na-telefone-08-01
Вам нужны щедрые #бонусы, прибыльные #акции и свежие #промокоды для #1Win (#1Вин)? В таком случае подписывайтесь на наш Telegram-канал Web_1win!
Здесь вы обнаружите:
Актуальные #зеркало для #войти на официальный сайт #1Вин. Больше ограничений и сложностей с доступом!
Данные о самых выгодных #играх и #казино. Рейтинги, стратегии и подсказки для максимизации твоих шансов на победу.
Детальные инструкции по #регистрации и старту игры. Быстрый старт для начинающих.
Анонсы о #турнирах с большими призовыми фондами. Участвуйте и побеждайте!
Рекомендации по #безопасности вашего аккаунта и средств. Наша команда заботимся о вашей защите.
Обзоры о #мобильный приложении #1Вин. Наслаждайтесь игрой где захотите и когда угодно!
Реальные #отзывы клиентов о #1Вин. Посмотрите, что думают другие!
Подписывайтесь прямо сейчас и получите ключ к вселенной успеха и азарта с #1Win! Переходите: скачать 1вин
https://t.me/s/Web_1win
https://t.me/s/B26_1WIN/10
https://t.me/s/onewin_kanal/13525
https://t.me/s/onewin_kanal/10240
https://t.me/s/TgWin_1win/1186
https://t.me/top_casino_rating_igrat
https://t.me/s/Officiall_1win_ru
//t.me/s/official_1win_aviator](https://t.me/s/official_1win_aviator)
https://t.me/s/ef_beef
https://t.me/s/ef_beef
https://t.me/s/official_pokerdom_pokerdom
https://t.me/s/officials_casino_1win
https://t.me/mcasino_martin/103
https://t.me/officials_dragonmoney/5
https://t.me/s/EF_beef
https://t.me/s/it_marTIN_casino
https://t.me/s/officials_7K_casino
http://ezproxy.cityu.edu.hk/login?url=https://t.me/s/ofFIcials_7k_cASINO
https://t.me/s/kazino_s_minimalnym_depozitom
https://t.me/s/it_ezcash
https://t.me/ta_1win/10
https://t.me/s/kazino_s_minimalnyM_DEPOziTOM
https://t.me/s/top_onlajn_kazino_rossii
https://t.me/s/officlal_1win
https://groups.google.com/u/5/g/topcasino_rus/c/k4CgRVc5d24
https://t.me/s/prodvizhenie_telegram_v_top
Как составить банкролл-менеджмент
играть со смартфона
zofran sublingual cost
https://t.me/s/Portable_VOdds
https://t.me/s/DragonMoney_Portable
https://t.me/s/Official_Casino1win
https://t.me/R2T_7k/9479
https://t.me/s/Casino_1win_1win_1win
https://t.me/s/TeleCasino_1win/2257
https://t.me/s/Official_casino_1win_1win
https://t.me/s/TeleCasino_1Win/6
https://t.me/s/Ofitsialnyy_win1
https://t.me/s/Official_1xbet_1xbet
https://t.me/s/top_kazino5/374
https://t.me/s/kazino_s_minimalnym_depozitom
Правила вывода бонусов
мобильный браузер казино
side effects getting off wellbutrin xl
https://t.me/s/Portable_Cosmospin
https://t.me/vavada_win_vavada/337
https://t.me/s/Portable_BETUNLIM
https://t.me/sDragonMoney_Portable
https://t.me/R2T_7k/9479
https://t.me/s/Casino_1win_1win_1win
1Win — онлайн-казино с широкой линейкой игровых автоматов, живыми дилерами и ставками на спорт. Платформа предлагает высокие коэффициенты, бонусы и акции для игроков. Простота регистрации, быстрая поддержка и удобный интерфейс делают игровой опыт комфортным. Однако важно помнить о рисках азартных игр и играть ответственно.
https://t.me/s/mobile_1win/956
https://t.me/s/TeleCasino_1win/343
https://t.me/s/TeleCasino_1Win
https://telegra.ph/Rejting-nadezhnyh-kazino-10-proverennyh-ploshchadok-dlya-igry-na-dengi-08-01
https://t.me/s/play_1win_online
https://t.me/s/top_casino_rating_igrat
https://t.me/s/official_1_winn
https://t.me/s/EF_BEEF
https://clients1.google.com.lb/url?sa=t&url=https://t.me/s/OFfiCiAls_7K_CaSINo
https://t.me/s/kazino_s_minimalnym_depozitom
https://t.me/s/russiA_casINO_1WIN
https://dev.to/official_1win/1win-8n2
https://t.me/s/prodvizhenie_telegram_v_top
zyprexa crazy meds
https://t.me/s/Portable_Sprut
https://t.me/vavada_win_vavada/641
https://t.me/s/Portable_WazBee
https://t.me/sDragonMoney_Portable
https://t.me/R2T_7k/9479
https://t.me/s/Casino_1win_1win_1win
1Win — онлайн-казино с широкой линейкой игровых автоматов, живыми дилерами и ставками на спорт. Платформа предлагает высокие коэффициенты, бонусы и акции для игроков. Простота регистрации, быстрая поддержка и удобный интерфейс делают игровой опыт комфортным. Однако важно помнить о рисках азартных игр и играть ответственно.
https://t.me/s/mobile_1win/956
https://t.me/cVavada_vavada
https://t.me/s/TeleCasino_1Win/895568
https://telegra.ph/Top-5-kazino-s-molnienosnymi-vyplatami-08-01
https://t.me/s/play_1win_online
https://t.me/top_casino_rating_igrat
https://t.me/s/official_1_winn
https://t.me/s/ef_beef
https://t.me/s/officials_dragonmoney/8
https://t.me/s/EF_BEEF
https://t.me/s/it_marTiN_cAsino
https://toolbarqueries.google.com.tw/url?sa=t&url=https://t.me/s/offiCiALs_7k_casINO
https://t.me/s/kazino_s_minimalnym_depozitom
https://t.me/s/russiA_CASIno_1wiN
https://s/t.me/s/tx_1win/502
https://t.me/s/top_onlajn_kazino_rossii
https://t.me/s/officlal_1win
zyprexa for migraines
https://t.me/s/Portable_ZulaBet
https://t.me/s/DragonMoney_Portable
https://t.me/s/Official_Casino1win
https://t.me/R2T_7k/9479
https://t.me/s/Official_1xbet_1xbet
https://t.me/s/top_kazino5/538
https://t.me/s/kazino_s_minimalnym_depozitom
what is zetia used to treat
https://t.me/s/vavada_official_vavada
https://t.me/s/kazino_s_minimalnym_depozitom
difference between ondansetron and zofran
https://t.me/s/Portable_Snatch
https://t.me/s/DragonMoney_Portable
https://t.me/R2T_7k/9479
https://t.me/s/Casino_1win_1win_1win
PokerDom: всё об акциях, турнирах и стратегиях! Зеркало, официальный сайт. Скачать приложение и регистрация с промокодом. Вход, отзывы, бездепозитный бонус, мобильное приложение!
https://t.me/s/Top_PokerDom
https://t.me/s/Official_casino_1win_1win
https://t.me/TeleCasino_1Win/6
https://t.me/Official_1xbet_1xbet
https://t.me/s/top_kazino5/607
https://t.me/s/kazino_s_minimalnym_depozitom
Безопасность депозитов
казино без задержек
what is a good alternative to wellbutrin
https://t.me/s/vavada_official_vavada
https://t.me/s/kazino_s_minimalnym_depozitom
10 Lotto Online 10line oynamaq təhlükəsizdir?, lotereya oyunlarının təhlükəsizliyi və qaydalara uyğunluğu haqqında məlumat təqdim edir. Bu, istifadəçilərə lotereya oynamanın təhlükəsiz olduğunu və platformanın bütün tədbirləri götürdüyünü göstərir ki, onlar oyun prosesinə güvənə bilərlər.
https://t.me/s/vavada_official_vavada
https://t.me/s/kazino_s_minimalnym_depozitom
İstifadəçi Təcrübələri və Rəyləri, istifadəçilərin platforma ilə bağlı fikirlərini və təcrübələrini paylaşmaq üçün bir məkan təmin edir. Bu, yeni istifadəçilərə platformanın pullu loto keyfiyyətini qiymətləndirmək üçün dəyərli məlumatlar təmin edir.
https://t.me/s/vavada_official_vavada
https://t.me/s/Official_1xbet_1xbet
https://t.me/s/kazino_s_minimalnym_depozitom
https://t.me/s/besplatnaya_parkovka_avto/12
Спасибо за информацию, которую нигде не мог найти. Сделанная с любовью и вниманием к деталям, мебель из сосны деревянная мебель станет не только функциональным элементом интерьера, но и настоящим произведением искусства.
https://t.me/s/Portable_Twin
https://t.me/s/DragonMoney_Portable
Казино без проверки документов
https://t.me/R2T_7k/9479
https://t.me/s/Casino_1win_1win_1win
https://t.me/s/TeleCasino_1win/2777
https://t.me/TeleCasino_1Win/6
https://t.me/s/play_1win_online
https://t.me/s/top_casino_rating_igrat
https://t.me/s/official_1_winn
https://t.me/s/kazino_s_minimalnym_depozitom
levitra tablet
https://t.me/vavada_win_vavada/343
https://t.me/s/Portable_Wildio
https://t.me/sDragonMoney_Portable
https://t.me/s/RatingCasinoRu
https://t.me/R2T_7k/9479
https://t.me/s/Casino_1win_1win_1win
https://t.me/s/TeleCasino_1win/193
https://t.me/s/TeleCasino_1Win
https://telegra.ph/Top-5-nadezhnyh-kazino-dlya-igry-na-telefone-08-01-3
https://t.me/s/play_1win_online
https://t.me/s/Casino_top2
https://t.me/s/official_1_winn
https://t.me/s/Fresh_officials
https://t.me/s/kazino_s_minimalnym_depozitom
https://marketplace.bogalusadailynews.com/AdHunter/bogalusa/Home/EmailFriend?url=https://t.me/s/oFfiCIaLS_7K_cAsINo
https://t.me/s/kazino_s_minimalnym_depozitom
https://t.me/s/russIa_CaSIno_1Win
Безопасное зеркало 1win https://t.me/s/casino1win_rus
tadalafil 10mg price
https://t.me/s/vavada_official_vavada
https://t.me/Martin_Casino_TG/1067
https://t.me/s/Official_1xbet_1xbet
https://t.me/s/top_kazino5/541
https://t.me/s/kazino_s_minimalnym_depozitom
казино Atom официальный Telegram канал https://t.me/s/Atom_official_rus
is there a generic levitra
https://t.me/s/Portable_Betway
1вин
https://t.me/s/Portable_1win
https://t.me/vavada_win_vavada/215
https://t.me/vavada_win_vavada/524
https://t.me/s/Portable_LadyHammer
https://t.me/DragonMoney_Portable/4489
https://t.me/s/OcCasinoTop
https://t.me/R2T_7k/9479
https://t.me/s/Casino_1win_1win_1win
https://vk.com/wall-231374912_34
Играйте в лучшие слоты 1win online. Ежедневные бонусы на лучшем онлайн-казинo 1вин. Подписывайтесь и игайте с нами!
https://t.me/s/TopTg_1WIN
Ищешь лучшие места для ставок с минимальными рисками? Мы покопались в мире азартных игр и подготовили для тебя Топ 15 надежных онлайн-казинo с минимальными ставками! Каждое из этих казинo имеет лицензию, так что можешь смело играть, не беспокоясь о безопасности.
https://t.me/s/rejting_top_luchshih_kazino/205
https://t.me/cVavada_vavada
https://t.me/s/TeleCasino_1x
https://t.me/s/TeleCasino_1Win
https://telegra.ph/Rejting-10-luchshih-mobilnyh-kazino-dlya-igry-na-telefone-08-01
Вам интересны щедрые #бонусы, выгодные #акции и свежие #промокоды для #1Win (#1Вин)? Тогда присоединяйтесь на наш Telegram-канал Web_1win!
Здесь вы обнаружите:
Свежие #зеркало чтобы #войти на официальный сайт #1Вин. Никаких блокировок и проблем с доступом!
Информация о самых выгодных #играх и #казино. Обзоры, стратегии и подсказки для максимизации твоих шансов на выигрыш.
Детальные инструкции по #регистрации и старту игры. Легкий старт для новичков.
Анонсы о #турнирах с большими призовыми фондами. Участвуйте и выигрывайте!
Советы по #безопасности твоего аккаунта и финансов. Мы беспокоится о твоей защите.
Отзывы о #мобильный приложении #1Вин. Наслаждайтесь игрой где захотите и когда захотите!
Честные #отзывы клиентов о #1Вин. Узнайте, что думают другие!
Подписывайтесь прямо сейчас и получите доступ к миру успеха и азарта с #1Win! Ссылка: 1win casino сайт
https://t.me/s/Web_1win/1111
https://t.me/s/Webs_1win/192
https://t.me/s/Webs_1win
https://t.me/s/onewin_kanal/13305
https://t.me/s/Topchik_1WIN
От себя скажу подписалась на менеджер 1win — удобный канал о 1win. Здесь часто появляются обзоры бонусов, стратегий + лайфхаки для старта. Контент по делу. советую.
https://t.me/top_casino_rating_igrat
https://t.me/s/Officiall_1win_ru
https://t.me/s/official_1win_aviator
https://t.me/s/ef_beef
https://t.me/s/Official_Ru_1WIN/150
https://t.me/s/ks_1xbet
https://t.me/s/official_pokerdom_pokerdom
https://t.me/s/leon_casino_play
https://t.me/s/xbet_official_1xbet
https://t.me/s/officials_casino_1win
https://t.me/mcasino_martin/650
https://t.me/s/officials_dragonmoney/13
https://t.me/s/EF_beef
https://t.me/s/kazino_s_minimalnym_depozitom
https://t.me/s/it_marTIn_CaSiNO
https://t.me/s/officials_7K_casino
https://maps.google.com.ag/url?sa=t&url=https://t.me/s/OFfIcIALs_7k_caSIno
https://t.me/s/kazino_s_minimalnym_depozitom
https://t.me/s/it_ezcash
https://t.me/ta_1win/1006
https://t.me/s/kazino_s_minimalnym_DePOzITOm
https://t.me/s/kazino_s_minimAlNyM_DepOzITom
https://groups.google.com/u/5/g/topcasino_rus/c/k4CgRVc5d24
https://t.me/s/prodvizhenie_telegram_v_top
what does levitra do
казино 1вин
https://t.me/s/Portable_NeonClub
1 вин
https://t.me/vavada_win_vavada/209
https://t.me/s/Portable_Weiss
https://t.me/sDragonMoney_Portable
https://t.me/s/OC_Hype
https://t.me/R2T_7k/9479
https://t.me/s/Casino_1win_1win_1win
https://vk.com/wall-231374912_52
1Win — онлайн-казино с широкой линейкой игровых автоматов, живыми дилерами и ставками на спорт. Платформа предлагает высокие коэффициенты, бонусы и акции для игроков. Простота регистрации, быстрая поддержка и удобный интерфейс делают игровой опыт комфортным. Однако важно помнить о рисках азартных игр и играть ответственно.
https://t.me/Mobile_1win/575
https://t.me/s/TopTgCasino2025
https://t.me/cVavada_vavada
https://t.me/s/TeleCasino_VAVADA
https://t.me/s/TeleCasino_1Win/991578
https://telegra.ph/Rejting-15-luchshih-kazino-dlya-igrokov-v-Rossii-08-01-3
https://t.me/s/official_1win_site_2025
https://t.me/s/Official_1win_official_1win/614
https://t.me/s/Magik_7k
https://t.me/top_casino_rating_igrat
https://t.me/s/Officiall_1win_ru
https://t.me/s/official_1win_aviator
https://t.me/s/ef_beef
https://t.me/s/official_pokerdom_pokerdom
https://t.me/s/mcasino_martin/540
https://t.me/s/officials_dragonmoney/2
https://t.me/s/EF_beef
https://t.me/s/it_marTIn_CaSINO
http://podnova.com/player/player_add_frame.php?url=https://t.me/s/OffIciALS_7K_CasiNO
https://t.me/s/kazino_s_minimalnym_depozitom
https://t.me/s/it_ezcash
https://t.me/ta_1win/344
https://s/t.me/s/tx_1win/779
https://t.me/s/top_onlajn_kazino_rossii
https://groups.google.com/u/5/g/topcasino_rus/c/k4CgRVc5d24
https://t.me/s/prodvizhenie_telegram_v_top
Математическое ожидание слотов
рейтинг новых казино
levitra 20 mg online
1win casino вход
https://t.me/s/Portable_NanoGames
1 win
https://t.me/s/Portable_1win
https://t.me/vavada_win_vavada/100
https://t.me/vavada_win_vavada/140
https://t.me/DragonMoney_Portable/4538
https://t.me/s/OC_Bui
https://t.me/s/OcCasinoTop
https://t.me/s/Casino_1win_1win_1win
https://vk.com/wall-231374912_61
https://t.me/s/TOPCaSInO_PoRtaBle
PokerDom: всё об акциях, турнирах и стратегиях! Зеркало, официальный сайт. Скачать приложение и регистрация с промокодом. Вход, отзывы, бездепозитный бонус, мобильное приложение!
https://t.me/s/Top_PokerDom
Ищешь лучшие места для ставок с минимальными рисками? Мы покопались в мире азартных игр и подготовили для тебя Топ 15 надежных онлайн-казинo с минимальными ставками! Каждое из этих казинo имеет лицензию, так что можешь смело играть, не беспокоясь о безопасности.
https://t.me/TopTG_Casino777/383
Ищешь лучшие места для ставок с минимальными рисками? Мы покопались в мире азартных игр и подготовили для тебя Топ 15 надежных онлайн-казинo с минимальными ставками! Каждое из этих казинo имеет лицензию, так что можешь смело играть, не беспокоясь о безопасности.
https://t.me/s/rejting_top_luchshih_kazino/186
https://t.me/cVavada_vavada
https://t.me/s/TeleCasino_1x
https://t.me/s/TeleCasino_1Win
https://telegra.ph/Top-5-kazino-dlya-igry-na-telefone-08-01
https://t.me/TG_Official_1win
промокоды 1win сегодня
https://t.me/s/Web_1win/1214
https://t.me/s/Webs_1win/356
https://t.me/s/Webs_1win
https://t.me/s/onewin_kanal/10080
https://t.me/s/onewin_kanal/11295
https://t.me/s/Topchik_1WIN
Лично я слежу за 1win зеркало рабочее — полезный чат о 1win. Тут регулярно выходят разборы бонусов, подходов и рекомендации начинающим. Материалы кратко. советую.
https://t.me/top_casino_rating_igrat
https://t.me/s/Officiall_1win_ru
https://t.me/online_1_win/15721
//t.me/s/official_1win_aviator](https://t.me/s/official_1win_aviator)
https://t.me/s/ef_beef
https://t.me/s/Official_Ru_1WIN/1124
https://t.me/s/ks_1xbet
https://t.me/s/official_pokerdom_pokerdom
https://t.me/s/leon_casino_play
https://t.me/s/xbet_official_1xbet
https://t.me/s/officials_casino_1win
https://t.me/mcasino_martin/150
https://t.me/s/officials_dragonmoney/8
https://t.me/s/EF_beef
https://t.me/s/kazino_s_minimalnym_depozitom
https://t.me/s/it_marTiN_CasiNo
https://t.me/s/officials_7k_casino
http://poly-ren.com/cutlinks2/rank.php?url=https://t.me/s/OfFICiAls_7K_CASINO
https://t.me/s/kazino_s_minimalnym_depozitom
https://t.me/s/it_ezcash
https://t.me/s/ta_1win/1033
https://t.me/s/kazino_s_minimalnyM_dEpOzITom
https://t.me/s/kazino_s_minimAlNyM_DePOzitom
https://t.me/s/officlal_1win
https://t.me/s/Atom_official_rus
https://t.me/s/prodvizhenie_telegram_v_top
Надежный сайт
где можно вывести деньги
tadalafil without a doctor prescription
https://t.me/s/vavada_official_vavada
https://t.me/s/kazino_s_minimalnym_depozitom
tadalafil 30mg per ml x 30 ml
https://t.me/s/Portable_Betiro
https://t.me/vavada_win_vavada/181
https://t.me/s/Portable_Frank
https://t.me/sDragonMoney_Portable
https://t.me/s/RatingCasinoRu
https://t.me/R2T_7k/9479
https://t.me/s/Casino_1win_1win_1win
https://t.me/s/TeleCasino_1win/563
https://t.me/s/TeleCasino_1Win
https://telegra.ph/Top-onlajn-kazino-bez-registracii-igrajte-bez-lishnih-zabot-08-01
https://t.me/s/play_1win_online
https://t.me/s/top_casino_rating_igrat
https://t.me/s/official_1_winn
https://t.me/s/kazino_s_minimalnym_depozitom
http://alt1.toolbarqueries.google.cz/url?q=https://t.me/s/OffIcIALS_7K_CaSINO
https://t.me/s/kazino_s_minimalnym_depozitom
https://t.me/s/russia_casiNo_1win
https://t.me/s/prodvizhenie_telegram_v_top
20mg tadalafil
https://t.me/s/Portable_Everum
1вин
https://t.me/vavada_win_vavada/447
https://t.me/s/Portable_LadyLinda
https://t.me/sDragonMoney_Portable
https://t.me/s/RatingCasinoRu
https://t.me/R2T_7k/9479
https://t.me/s/Casino_1win_1win_1win
https://vk.com/wall-231374912_65
https://t.me/cVavada_vavada
https://t.me/s/TeleCasino_1Win/997778
https://telegra.ph/Top-10-chestnyh-onlajn-kazino-s-bystrymi-vyplatami-08-01-2
https://t.me/s/Webs_1win/79
https://t.me/s/TgWin_1win/1002
https://t.me/top_casino_rating_igrat
https://t.me/s/official_1_winn
https://t.me/s/official_pokerdom_pokerdom
https://t.me/s/officials_dragonmoney/6
https://t.me/s/EF_BEEF
https://t.me/s/it_martIn_CasInO
https://www.hearthpwn.com/linkout?remoteurl=https://t.me/s/OffICIals_7k_cAsInO
https://t.me/s/kazino_s_minimalnym_depozitom
https://t.me/s/it_ezcash
https://t.me/s/russiA_CASinO_1wiN
https://s/t.me/s/tx_1win/553
https://t.me/s/top_onlajn_kazino_rossii
https://t.me/s/prodvizhenie_telegram_v_top
cialis quid
Бесплатные игровые автоматы в казино 1win
https://t.me/s/Portable_Vibe
1win
https://t.me/vavada_win_vavada/422
https://t.me/vavada_win_vavada/511
https://t.me/s/Portable_PartyPoker
https://t.me/DragonMoney_Portable/4504
https://t.me/s/OC_Taker
https://t.me/s/OcCasinoTop
Не секрет, что большинство игроков в онлайн-казино жаждут одного – чтобы их выигрыши не остались лишь красивыми цифрами на экране. Проблема с выводом средств остаётся актуальной для многих, и к этому вопросу стоит подходить с особой внимательностью.
При выборе лучшего онлайн-казино для игры на деньги главным критерием всегда будет именно возможность быстрого и безопасного вывода средств. Важно не только получить свой выигрыш, но и сделать это без лишних проблем. Как же выбрать надёжное место для игры, где этот процесс будет максимально простым и быстрым?
Онлайн-казино с выводом средств должны предложить игрокам не только обширный выбор игр и бонусов, но и гарантировать безопасность транзакций. Конечно, все казино обещают золотые горы, но настоящие лидеры рейтинга – это те, кто давно зарекомендовал себя на рынке и имеет положительные отзывы игроков. Зачем рисковать своими средствами, когда можно выбрать среди проверенных казино?
Преимущества таких платформ очевидны. Во-первых, они используют защищённые каналы для всех финансовых операций. Во-вторых, на таких сайтах обычно доступна не одна, а несколько популярных систем для вывода денег. Это могут быть как традиционные банковские переводы, так и электронные кошельки или криптовалюты. Всё зависит от ваших предпочтений.
Не стоит забывать и о таких моментах, как сроки вывода. Важно, чтобы выигранные деньги поступали на счёт игрока без долгих ожиданий. Лучшие казино всегда работают над тем, чтобы предложить максимально быстрые транзакции. В некоторых случаях, при определённых условиях, деньги могут быть переведены уже через несколько минут!
Конечно, есть и свои недостатки. Например, на некоторых платформах могут взимать комиссию за вывод средств, что, согласитесь, не всегда приятно. Но это скорее исключение, чем правило. К тому же, в топ казино обычно такие моменты чётко прописаны в правилах, и игроки всегда могут ознакомиться с ними до того, как сделают первый депозит.
Чтобы не попасть в ловушку недобросовестных казино, важно проверять лицензии, отзывы других игроков, а также общую репутацию ресурса. Если сайт активно работает в социальных сетях, у него есть общедоступная информация о партнёрских программах и проводимых акциях – это хороший знак.
В заключение, выбирая казино с выводом средств, не стоит спешить. Лучше заранее оценить все плюсы и минусы, почитать отзывы, посмотреть на репутацию сайта. Помните, что хорошее онлайн казино не только предлагает отличные игры, но и гарантирует безопасность ваших финансов.
Если хотите всегда быть в курсе актуальных предложений и лучших сайтов для игры, подписывайтесь на наш канал.
https://t.me/s/Casino_1win_1win_1win
https://vk.com/wall-231374912_49
https://t.me/s/TOPCaSIno_PoRtabLE
1Win — онлайн-казино с широкой линейкой игровых автоматов, живыми дилерами и ставками на спорт. Платформа предлагает высокие коэффициенты, бонусы и акции для игроков. Простота регистрации, быстрая поддержка и удобный интерфейс делают игровой опыт комфортным. Однако важно помнить о рисках азартных игр и играть ответственно.
https://t.me/Mobile_1win/526
Ищешь лучшие места для ставок с минимальными рисками? Мы покопались в мире азартных игр и подготовили для тебя Топ 15 надежных онлайн-казинo с минимальными ставками! Каждое из этих казинo имеет лицензию, так что можешь смело играть, не беспокоясь о безопасности.
https://t.me/s/rejting_top_luchshih_kazino/192
https://t.me/cVavada_vavada
https://t.me/s/TeleCasino_7K
https://t.me/s/TeleCasino_1Win
https://telegra.ph/Top-5-nadezhnyh-kazino-na-telefone-08-01
Тебе нужны щедрые #бонусы, прибыльные #акции и свежие #промокоды для #1Win (#1Вин)? Тогда присоединяйтесь на наш Telegram-канал Web_1win!
Здесь вы обнаружите:
Свежие #зеркало чтобы #войти на официальный сайт #1Вин. Никаких блокировок и проблем с доступом!
Данные о лучших #играх и #казино. Рейтинги, стратегии и подсказки чтобы максимизации ваших шансов на победу.
Детальные инструкции по #регистрации и старту игры. Легкий начало для начинающих.
Анонсы о #турнирах с большими призовыми фондами. Участвуйте и побеждайте!
Советы по #безопасности твоего аккаунта и финансов. Мы заботимся о твоей защите.
Отзывы о #мобильный приложении #1Вин. Наслаждайтесь игрой где угодно и когда угодно!
Честные #отзывы клиентов о #1Вин. Посмотрите, что думают другие!
Присоединяйтесь прямо сейчас и не упустите шанс получить доступ к миру успеха и развлечений с #1Win! Ссылка: 1 1win зеркало
https://t.me/s/Web_1win
https://t.me/s/B27_1WIN/36
https://t.me/s/onewin_kanal/13185
https://t.me/s/TgWin_1win/795
https://t.me/s/Magik_7k
https://t.me/s/reyting_online_kazino/RTP_i_Volatilnost_Obyasnenie
https://t.me/s/TopCasino199
https://t.me/s/Casino_top2
https://t.me/s/Officiall_1win_ru
https://t.me/s/spisok_oficialnyh_kazino
//t.me/s/official_1win_aviator](https://t.me/s/official_1win_aviator)
https://t.me/s/ef_beef
https://t.me/s/ef_beef
https://t.me/s/official_pokerdom_pokerdom
https://t.me/s/xbet_official_1xbet
https://t.me/s/officials_casino_1win
https://t.me/s/mcasino_martin/576
https://t.me/officials_dragonmoney/5
https://t.me/s/EF_beef
https://t.me/s/ezcash_officials/38
https://t.me/s/it_marTiN_CaSinO
https://t.me/s/Officials_7K_Casino
https://www.ranky.sk/ikonky.php?url=https://t.me/s/ofFICIALs_7k_cASIno
https://t.me/s/kazino_s_minimalnym_depozitom
https://t.me/s/it_ezcash
https://t.me/ta_1win/805
https://t.me/s/kazino_s_minimalnyM_DePoZitOM
https://t.me/s/kazino_s_minimAlNYm_dEPOZIToM
https://t.me/s/officlal_1win
https://groups.google.com/u/5/g/topcasino_rus/c/k4CgRVc5d24
https://t.me/s/prodvizhenie_telegram_v_top
levitra vs cialis
https://t.me/s/Portable_BetSofa
https://t.me/vavada_win_vavada/619
https://t.me/sDragonMoney_Portable
https://t.me/s/RatingCasinoRu
https://t.me/R2T_7k/9479
https://t.me/s/Casino_1win_1win_1win
https://vk.com/wall-231374912_65
1Win — онлайн-казино с широкой линейкой игровых автоматов, живыми дилерами и ставками на спорт. Платформа предлагает высокие коэффициенты, бонусы и акции для игроков. Простота регистрации, быстрая поддержка и удобный интерфейс делают игровой опыт комфортным. Однако важно помнить о рисках азартных игр и играть ответственно.
https://t.me/s/mobile_1win/296
https://t.me/cVavada_vavada
https://t.me/s/TeleCasino_1Win/981778
https://telegra.ph/Rejting-15-nadezhnyh-onlajn-kazino-s-otlichnoj-otdachej-08-01
https://t.me/s/TgWin_1win/465
https://t.me/top_casino_rating_igrat
https://t.me/s/official_1_winn
https://t.me/s/official_pokerdom_pokerdom
https://t.me/s/officials_dragonmoney/10
https://t.me/s/EF_BEEF
https://t.me/s/it_martiN_cAsInO
https://clients1.google.rw/url?sa=t&url=https://t.me/s/OFfiCIalS_7K_CasIno
https://t.me/s/kazino_s_minimalnym_depozitom
https://t.me/s/it_ezcash
https://t.me/s/russia_caSino_1win
https://s/t.me/s/tx_1win/69
https://t.me/s/top_onlajn_kazino_rossii
https://t.me/s/officlal_1win
https://t.me/s/prodvizhenie_telegram_v_top
levitra cost
https://t.me/s/vavada_official_vavada
https://t.me/s/a_official_1xbet
https://t.me/s/kazino_s_minimalnym_depozitom
no prescription cialis
https://t.me/s/Portable_Bitzamo
https://t.me/s/DragonMoney_Portable
https://t.me/R2T_7k/9479
https://t.me/s/Casino_1win_1win_1win
https://t.me/s/TeleCasino_1win/5717
https://t.me/s/Official_casino_1win_1win
https://t.me/s/TeleCasino_1Win/5
https://t.me/s/Ofitsialnyy_win1
https://t.me/s/Official_1xbet_1xbet
https://t.me/s/top_kazino5/127
промокоды казино без мусора — один канал, где всё по делу
Не люблю охоту за «рабочими кодами» по шумным чатам. Хочется нажать — и видеть: что дают, куда вводить, до какого времени. Без квестов, без капса, без «срочно успей».
Держу под рукой один источник: https://t.me/s/Best_promocode_rus
В ленте — короткие карточки: промо на слоты, live, crash; пометка «актуально сегодня»; сразу видно, есть ли фриспины или бонус к депозиту. Никаких загадок. Открыл, посмотрел, решил — подходить ли под твой план на вечер.
Почему это удобно? Потому что экономит внимание. Ты не читаешь километры текста, не ловишь фейки, не споришь с «ботами-оракулами». Просто выбираешь предложение, которое реально в тему — или пролистываешь дальше. Иногда лучший выбор — пролистать.
Сохрани ссылку. Когда захочешь добавить немного «топлива» к сессии, не придётся искать с нуля.
https://t.me/s/kazino_s_minimalnym_depozitom
levitra prices
https://t.me/s/vavada_official_vavada
https://t.me/s/kazino_s_minimalnym_depozitom
Промокоды на бонусы
сроки проверки документов
Оптимизируйте свои шансы на победу в крейзи тайм демо изучая статистику игры и разрабатывая собственные стратегии. Покажите всем, что вы здесь, чтобы побеждать!
https://t.me/s/Portable_Pasino
1 вин
https://t.me/vavada_win_vavada/84
https://t.me/s/Portable_GoldenStar
https://t.me/sDragonMoney_Portable
https://t.me/s/OC_Selektor
https://t.me/s/OcCasinoTop/37
https://t.me/R2T_7k/9479
https://t.me/s/Casino_1win_1win_1win
https://vk.com/wall-231374912_58
1Win — онлайн-казино с широкой линейкой игровых автоматов, живыми дилерами и ставками на спорт. Платформа предлагает высокие коэффициенты, бонусы и акции для игроков. Простота регистрации, быстрая поддержка и удобный интерфейс делают игровой опыт комфортным. Однако важно помнить о рисках азартных игр и играть ответственно.
https://t.me/Mobile_1win/48
https://t.me/s/TopTgCasino2025
https://t.me/cVavada_vavada
https://t.me/s/TeleCasino_1x
https://t.me/s/TeleCasino_1Win/940468
https://telegra.ph/Top-chestnyh-kazino-s-minimalnymi-stavkami-08-01
Тебе интересны крупные #бонусы, прибыльные #акции и актуальные #промокоды для #1Win (#1Вин)? В таком случае подписывайтесь на наш Telegram-канал Web_1win!
Здесь вы найдете:
Актуальные #зеркало для #войти на официальный #1Вин. Никаких блокировок и проблем с доступом!
Данные о самых выгодных #играх и #казино. Обзоры, советы и подсказки чтобы увеличения ваших шансов на выигрыш.
Детальные инструкции по #регистрации и началу игры. Быстрый старт для начинающих.
Анонсы о #турнирах с большими призовыми фондами. Присоединяйтесь и выигрывайте!
Советы по #безопасности вашего аккаунта и финансов. Мы заботимся о вашей сохранности.
Обзоры о #мобильный приложении #1Вин. Играйте где захотите и когда угодно!
Честные #отзывы клиентов о #1Вин. Узнайте, что говорят другие!
Подписывайтесь прямо сейчас и получите доступ к миру выгод и развлечений с #1Win! Ссылка: 1win win
https://t.me/s/official_1win_site_2025
https://t.me/s/Official_1win_official_1win/648
https://t.me/s/TgWin_1win/1018
https://t.me/s/top_casino_rating_igrat
https://t.me/s/Officiall_1win_ru
https://t.me/s/official_1win_aviator
https://t.me/s/official_pokerdom_pokerdom
https://t.me/mcasino_martin/280
https://t.me/officials_dragonmoney/11
https://t.me/s/EF_beef
https://t.me/s/it_martIN_caSINO
http://www.google.ba/url?q=https://t.me/s/OFFicIAls_7k_cAsINo
https://t.me/s/kazino_s_minimalnym_depozitom
https://t.me/s/it_ezcash
https://t.me/ta_1win/176
https://s/t.me/s/tx_1win/256
https://t.me/s/top_onlajn_kazino_rossii
https://groups.google.com/u/5/g/topcasino_rus/c/k4CgRVc5d24
https://t.me/s/prodvizhenie_telegram_v_top
Самые крупные джекпоты
карты кошельки переводы
Hello there, I discovered your site by means of Google while searching for a
comparable subject, your web site came up, it seems great.
I’ve bookmarked it in my google bookmarks.
Hello there, simply turned into alert to your weblog through Google, and located that
it’s truly informative. I am going to be careful for brussels.
I’ll appreciate if you continue this in future.
Numerous other people will probably be benefited out of your writing.
Cheers!
https://t.me/s/Portable_Betway
https://t.me/s/DragonMoney_Portable
https://t.me/R2T_7k/9479
https://t.me/s/Casino_1win_1win_1win
https://t.me/Martin_Casino_TG/26
https://t.me/s/TeleCasino_1win/2457
https://t.me/TeleCasino_1Win/3
https://t.me/s/play_1win_online
https://t.me/s/top_casino_rating_igrat
https://t.me/s/top_kazino5
https://t.me/s/kazino_s_minimalnym_depozitom
Джекпоты в автоматах
лучшие онлайн казино
Sweet blog! I found it while surfing around on Yahoo News.
Do you have any suggestions on how to get listed in Yahoo News?
I’ve been trying for a while but I never seem to get
there! Many thanks
https://t.me/s/vavada_official_vavada
https://t.me/Martin_Casino_TG/405
https://t.me/s/Official_1xbet_1xbet
https://t.me/s/top_kazino5/615
https://t.me/s/kazino_s_minimalnym_depozitom
Официальный Telegram 1win — канал, где лежит то, что обычно ищут по 10 вкладкам:
промокоды 1win, бонусы 1win, рабочая ссылка / зеркало 1win, обновления приложения 1win, короткие ориентиры по линии и коэффициентам на матчи + апдейты по казино 1win.
Зашёл. Взял. Применил. !+! https://t.me/s/play_1win_ru !+!
Подписка на 1win Telegram — чтобы важное приходило первым, а не “когда уже поздно”.
Ищете, какие слоты реально рвали лобби и выдавали главные заносы по итогам 2025 года?
Залетайте в Telegram-канал @igaming_live за честным рейтингом Топ-20 автоматов, где проверенные хиты красиво уделали все новинки!
https://t.me/s/iGaming_live/4901
#слоты #заносы #топслотов #онлайнказино #лучшиеслоты #igaming #казинострим #bigwin #pragmaticplay #hacksawgaming #слоты2025 #азартныеигры #казиноонлайн
Здесь вы найдете разнообразный
видео контент ялта интурист официальный цены на 2024 июль
https://t.me/s/Portable_Kingdom
https://t.me/sDragonMoney_Portable
https://t.me/R2T_7k/9479
https://t.me/s/Casino_1win_1win_1win
1Win — онлайн-казино с широкой линейкой игровых автоматов, живыми дилерами и ставками на спорт. Платформа предлагает высокие коэффициенты, бонусы и акции для игроков. Простота регистрации, быстрая поддержка и удобный интерфейс делают игровой опыт комфортным. Однако важно помнить о рисках азартных игр и играть ответственно.
https://t.me/s/TopTg_1win
https://t.me/s/TeleCasino_1win/1523
https://t.me/TeleCasino_1Win/6
https://t.me/s/play_1win_online
https://t.me/s/Casino_top2
https://t.me/s/official_1_winn
https://t.me/s/Best_promocode_rus/3336
https://t.me/s/kazino_s_minimalnym_depozitom
https://t.me/s/prodvizhenie_telegram_v_top
Лидеры мирового гемблинга
мобильные казино
Thanks for finally writing about > llamafile:一个无需安装配置、跨平台运行大型语言模型的神器! –
紫竹林精舍 < Loved it!
живое казино 1win
https://t.me/s/Portable_Spinia
1вин
https://t.me/vavada_win_vavada/108
https://t.me/vavada_win_vavada/437
https://t.me/DragonMoney_Portable/4470
https://t.me/s/OcCasinoTop
https://t.me/s/Casino_1win_1win_1win
https://vk.com/wall-231374912_28
1Win — онлайн-казино с широкой линейкой игровых автоматов, живыми дилерами и ставками на спорт. Платформа предлагает высокие коэффициенты, бонусы и акции для игроков. Простота регистрации, быстрая поддержка и удобный интерфейс делают игровой опыт комфортным. Однако важно помнить о рисках азартных игр и играть ответственно.
https://t.me/Mobile_1win/966
https://t.me/s/TopTg777_Flagman
Ищешь лучшие места для ставок с минимальными рисками? Мы покопались в мире азартных игр и подготовили для тебя Топ 15 надежных онлайн-казинo с минимальными ставками! Каждое из этих казинo имеет лицензию, так что можешь смело играть, не беспокоясь о безопасности.
https://t.me/s/rejting_top_luchshih_kazino/235
https://t.me/cVavada_vavada
https://t.me/s/TeleCasino_VAVADA
https://t.me/s/TeleCasino_1Win
https://telegra.ph/Bezopasnye-kazino-s-licenziej-Kak-vybrat-nadezhnoe-mesto-dlya-igry-08-01
Вам нужны щедрые #бонусы, выгодные #акции и актуальные #промокоды для #1Win (#1Вин)? Тогда подписывайтесь на наш Telegram-канал Web_1win!
Здесь вы обнаружите:
Рабочие #зеркало для #войти на официальный #1Вин. Больше ограничений и проблем с доступом!
Данные о лучших #играх и #казино. Рейтинги, стратегии и подсказки чтобы увеличения твоих шансов на победу.
Детальные инструкции по #регистрации и старту игры. Легкий старт для начинающих.
Информация о #турнирах с крупными выигрышными фондами. Участвуйте и выигрывайте!
Рекомендации по #безопасности твоего аккаунта и средств. Наша команда заботимся о вашей сохранности.
Отзывы о #мобильный приложении #1Вин. Наслаждайтесь игрой где захотите и когда захотите!
Честные #отзывы клиентов о #1Вин. Узнайте, что говорят другие!
Подписывайтесь прямо сейчас и не упустите шанс получить доступ к вселенной успеха и развлечений с #1Win! Ссылка: 1вин бет официальный
https://t.me/s/Web_1win
https://t.me/s/B26_1WIN/98
https://t.me/s/onewin_kanal/10620
https://t.me/s/onewin_kanal/13855
https://t.me/s/TgWin_1win/875
https://t.me/top_casino_rating_igrat
https://t.me/s/Officiall_1win_ru
//t.me/s/official_1win_aviator](https://t.me/s/official_1win_aviator)
https://t.me/s/ef_beef
https://t.me/s/ef_beef
https://t.me/s/official_pokerdom_pokerdom
https://t.me/s/xbet_official_1xbet
https://t.me/s/officials_casino_1win
https://t.me/s/mcasino_martin/222
https://t.me/officials_dragonmoney/5
https://t.me/s/EF_beef
https://t.me/s/ezcash_officials/35
https://t.me/s/it_martIN_CAsino
https://t.me/s/officials_7K_casino
https://clients1.google.com.ar/url?sa=t&url=https://t.me/s/OFfiCiaLS_7K_CASINo
https://t.me/s/kazino_s_minimalnym_depozitom
https://t.me/s/it_ezcash
https://t.me/s/ta_1win/605
https://t.me/s/kazino_s_minimalnym_DEpOziTOM
https://t.me/s/kazino_s_minimAlNyM_DepozitOM
https://groups.google.com/u/5/g/topcasino_rus/c/k4CgRVc5d24
https://t.me/s/prodvizhenie_telegram_v_top
Как читать таблицу выплат слота
казино от 1 рубля
Активируйте дверь к улучшенной
версии себя – перейдите по ссылке на :~:text=%D0%A1%D0%B5%D1%80%D0%B3%D0%B5%D0%B9%20%D0%9A%D0%BE%D1%80%D0%BE%D1%82%D0%BA%D0%BE%D0%B2.%20%D0%9E%D0%BF%D1%81%D1%83%D0%B8%D0%BC%D0%BE%D0%BB%D0%BE%D0%B3%20%D0%BE%D0%BD%D0%BB%D0%B0%D0%B9%D0%BD
казино с быстрым выводом
https://t.me/s/Portable_Space
1вин
https://t.me/vavada_win_vavada/363
https://t.me/s/Portable_Kent
https://t.me/DragonMoney_Portable/4492
Если вы зашли сюда, то, наверно, думали, где найти достойное место для игр на реальные деньги. В конце концов, рынок онлайн-казино в России растёт как на дрожжах, и выбрать из сотен вариантов действительно сложно. Ну кто не хочет попасть в топ казино, где и выплаты быстрые, и игры честные, и эмоции зашкаливают? Именно поэтому мы подготовили для вас рейтинг казино, который поможет не ошибиться.
Самый главный критерий оценки — это надежность. Безопасность ваших денег, честность игр и прозрачность работы платформы — вот что важно. Потому что однажды, когда вы уже начинаете выигрывать, хочется, чтобы всё шло по-честному, а не пришлось бороться с недобросовестными сайтами.
Давайте посмотрим, чем отличаются лучшие и надежные казино в России. Представьте, вы попадаете в такое место, где всё сделано для вас: приятный дизайн, удобный интерфейс, быстрые выплаты и бонусы, которые реально работают. Эдакое уютное казино, где чувствуешь себя как дома, и не переживаешь — а вдруг деньги не выплатят? Ведь честные казино полностью соблюдают лицензии и правила. А ещё у них много акций и турниров, так что играть интересно и выгодно.
Знаете, у каждого человека есть свои любимчики. Кто-то любит классические слоты и рулетку, кто-то предпочитает покер и блекджек. В лучших казино собираются такие игры, что и сам не заметишь, как станешь профессионалом. И главное — все эти сайты работают без задержек и с хорошей поддержкой. Ну а если вдруг что — консультанты отвечают быстро и по делу.
Но есть и нюансы. Некоторые казино иногда бывают чрезмерно щедры на бонусы, но требуют много условий для их отыгрыша. Так что, выбирая лучшее казино в России, советуем обращать внимание не только на рекламные акции, но и на отзывы игроков. В интернете полно реальных историй — кто-то выиграл крупную сумму, а кто-то остался ни с чем из-за навязчивых условий.
Хочу сказать вам, что выбирать лучшее казино — это не просто, но интересно. Можно сказать так: это как искать свою second половинку, только для игры — важно почувствовать, что вам комфортно и надежно. Может, вы предпочитаете классические автоматы или предпочитаете покер? В любом случае, в топ казино всё есть. А ещё — приятный бонус: регулярные акции, подарки, быстрые выплаты — всё для вашего удовольствия.
В конце хотелось бы дать вам совет: не спешите, изучите рейтинг казино, рекомендации и отзывы. Не рискуйте своими деньгами в сомнительных местах. Путь к победе — это знание и выбор правильной платформы. И помните, что самый надежный источник информации — наш канал ТопРуКазино. Подписывайтесь и будьте в курсе всех новинок и лучших предложений в мире онлайн-казино России.
Выбирайте только проверенные и надежные казино, и пусть удача всегда будет на вашей стороне!
https://t.me/s/Casino_1win_1win_1win
https://vk.com/wall-231374912_60
1Win — онлайн-казино с широкой линейкой игровых автоматов, живыми дилерами и ставками на спорт. Платформа предлагает высокие коэффициенты, бонусы и акции для игроков. Простота регистрации, быстрая поддержка и удобный интерфейс делают игровой опыт комфортным. Однако важно помнить о рисках азартных игр и играть ответственно.
https://t.me/Mobile_1win/960
https://t.me/s/TopTgCasino2025
Ищешь лучшие места для ставок с минимальными рисками? Мы покопались в мире азартных игр и подготовили для тебя Топ 15 надежных онлайн-казинo с минимальными ставками! Каждое из этих казинo имеет лицензию, так что можешь смело играть, не беспокоясь о безопасности.
https://t.me/s/rejting_top_luchshih_kazino/226
https://t.me/cVavada_vavada
https://t.me/s/TeleCasino_7K
https://t.me/s/TeleCasino_1Win/934988
https://telegra.ph/Top-10-nadezhnyh-kazino-dlya-igrokov-v-Rossii-08-01
Тебе интересны крупные #бонусы, прибыльные #акции и свежие #промокоды для #1Win (#1Вин)? В таком случае присоединяйтесь на наш Telegram-канал Web_1win!
Здесь вы найдете:
Свежие #зеркало чтобы #войти на официальный #1Вин. Никаких ограничений и сложностей с доступом!
Информация о самых выгодных #играх и #казино. Рейтинги, советы и рекомендации для увеличения твоих шансов на выигрыш.
Подробные инструкции по #регистрации и началу игры. Легкий начало для новичков.
Анонсы о #турнирах с крупными выигрышными фондами. Присоединяйтесь и побеждайте!
Советы по #безопасности твоего аккаунта и средств. Наша команда заботимся о вашей сохранности.
Отзывы о #мобильный приложении #1Вин. Наслаждайтесь игрой где угодно и когда угодно!
Реальные #отзывы игроков о #1Вин. Узнайте, что думают другие!
Подписывайтесь прямо сейчас и не упустите шанс получить доступ к вселенной успеха и развлечений с #1Win! Ссылка: 1win приложение
https://t.me/s/Web_1win
https://t.me/s/B34_1WIN/40
https://t.me/s/onewin_kanal/11275
https://t.me/s/TgWin_1win/1607
https://t.me/s/Casino_top2
https://t.me/s/Officiall_1win_ru
//t.me/s/official_1win_aviator](https://t.me/s/official_1win_aviator)
https://t.me/s/ef_beef
https://t.me/s/ef_beef
https://t.me/s/official_pokerdom_pokerdom
https://t.me/s/officials_casino_1win
https://t.me/mcasino_martin/419
https://t.me/officials_dragonmoney/9
https://t.me/s/EF_beef
https://t.me/s/it_marTiN_cASINo
http://maps.google.com.mx/url?q=https://t.me/officials_7k/122
https://clients1.google.com.pr/url?q=https://t.me/s/ofFiCiAls_7k_CaSinO
https://t.me/s/kazino_s_minimalnym_depozitom
https://t.me/s/it_ezcash
https://t.me/s/ta_1win/22
https://t.me/s/kazino_s_minimalnyM_DepoZitoM
https://t.me/s/top_onlajn_kazino_rossii
https://groups.google.com/u/5/g/topcasino_rus/c/k4CgRVc5d24
https://t.me/s/prodvizhenie_telegram_v_top
70918248
References:
long term effects of anabolic steroids (https://healthcarestaff.org/employer/200mg-test-cycle/)
70918248
References:
Lykon testosteron test (https://www.jobindustrie.ma/companies/fabrication-testosterone-chez-lhomme/)
70918248
References:
ist testosteron – https://incomash.com/employer/optimiser-son-taux-testosterone/ –
https://t.me/s/vavada_official_vavada
70918248
References:
meditech Steroids (https://hasanhmt.com/job-responsibility-of-production-people-of-garments-industry/01/12/2021/)
viagra homme commander viagra en ligne
commander viagra en ligne acheter viagra sans ordonnance
viagra pas cher acheter viagra sans ordonnance
acheter viagra france viagra en ligne
https://t.me/s/Official_casino_1win_1win
https://t.me/s/Official_casino_1win_1win
acheter viagra france acheter viagra france
1win me
скачать 1win приложения
скачать 1win на андроид
1win рабочее зеркало на сегодня
1win зеркало сайта
https://t.me/s/onewin_kanal
viagra pas cher acheter viagra
Awesome! Its really awesome piece of writing, I have got much clear idea
concerning from this article.
What a data of un-ambiguity and preserveness of precious knowledge about unpredicted
feelings.
This piece of writing will assist the internet users for creating new
blog or even a weblog from start to end.
https://t.me/s/z_official_1xbet
https://t.me/s/spisok_oficialnyh_kazino
Просто знать – этого недостаточно.
Надо применять. Желать –
этого недостаточно. Надо делать
По теме.
There’s definately a great deal to know about this topic.
I like all of the points you’ve made.
Visit my web-site; ผงผักเคล 100%
Просто знать – этого недостаточно.
Надо применять. Желать – этого недостаточно.
Надо делать
По теме.
Greetings! Very useful advice in this particular article!
It’s the little changes that produce the biggest changes.
Thanks for sharing!
This piece of writing presents clear idea in favor of the new visitors of blogging, that
truly how to do running a blog.
https://t.me/s/kazino_s_minimalnym_depozitom
Thanks for sharing your info. I truly appreciate your efforts and I will be waiting for your further post thanks once again.
Krypto-Casinos sind Online-Glücksspielplattformen, bei denen Ein- und Auszahlungen über
Krypto laufen, z. B. BTC, ETH oder Stablecoins. In der Regel findest du dort klassische Games
wie Automaten, Roulette und Live-Dealer-Tische — nur die Zahlungsabwicklung funktioniert über Wallets und Blockchain-Transfers.
Bei einigen Plattformen wird dein Guthaben in Coins gehalten, bei anderen intern in Euro/Fiat abgerechnet und Krypto ist nur die Zahlungsart.
Der größte Unterschied zu normalen Casinos ist die Payment-Mechanik: Einzahlungen wirken oft schneller, aber Gebühren und Bestätigungszeiten hängen direkt vom Netzwerk und Coin ab.
Dazu kommt Kursrisiko: Wenn dein Balance in Coins geführt wird, kann der Gegenwert zwischen Deposit und Payout spürbar schwanken. Ein typischer Fail ist außerdem,
Netzwerk/Adresse zu verwechseln (z. B. USDT über die falsche Chain) — dann ist das Geld
im schlimmsten Fall weg.
Zuverlässigkeit und Fairness kommen nicht daher, dass „Krypto“ draufsteht, sondern durch Regulierung,
klare Bedingungen, Support und Responsible-Gaming-Tools.
Seriöse Anbieter haben transparente AGB, nachvollziehbare Bonusbedingungen, Begrenzungen und soliden KYC; dubiose Buden werben mit „ohne
Prüfung“ oder „ohne Limits“ und machen dann Stress bei Auszahlungen. Wenn du ein Crypto-Casino
auswählst, schau auf Betreiber-Transparenz, Auszahlungsprozess, Bonus-AGB und ob es echte
Schutzfunktionen gibt.
UJUSHNALD19801
Here is my web site :: Visit For more
Hi, i feel that i saw you visited my blog so i got here to go back
the desire?.I’m attempting to find issues to improve my web site!I assume its adequate to use a few of
your concepts!!
I am extremely impressed with your writing talents
as well as with the layout in your blog. Is this a
paid subject matter or did you modify it your self?
Either way stay up the nice high quality writing, it’s rare to look a great blog like this one nowadays..
Эта обзорная заметка содержит ключевые моменты и факты по актуальным вопросам. Она поможет читателям быстро ориентироваться в теме и узнать о самых важных аспектах сегодня. Получите краткий курс по современной информации и оставайтесь в курсе событий!
Детальнее – https://vivod-iz-zapoya-2.ru/
https://t.me/s/officlal_1win
Забудьте о скучных вечерах. Если вы ищете место, где адреналин зашкаливает, а эмоции бьют через край, добро пожаловать в вселенную Don8Play. Это больше, чем просто игра — это масштабное комьюнити, где каждый день превращается в шоу.
Что вас ждет на Don8Play?
Легендарные стримы: Наблюдайте за эпичными заносами в прямом эфире. Живые эмоции, общение в чате и атмосфера, которую не передать словами.
Безумные розыгрыши: Мы любим дарить подарки. Участвуйте в регулярных раздачах призов и денежных бонусов. Шанс есть у каждого!
Музыка и стиль: Don8Play — это современная культура. Мы на одной волне с вами: лучшие треки, актуальные мемы и полная свобода самовыражения.
В мире онлайн-развлечений важно быть в центре событий. Don8Play объединяет тех, кто любит риск, музыку и хорошую компанию. Присоединяйтесь к движению, следите за новостями и ловите свою удачу за хвост прямо сейчас.
https://www.don8play.ru/
https://t.me/Official_c1win/s/5839
https://t.me/Official_c1win/s/1632
https://t.me/Official_c1win/s/5111
https://t.me/Official_c1win/s/5581
https://t.me/Official_c1win/s/4292
https://t.me/Official_c1win/s/4835
https://t.me/Official_c1win/s/2514
https://t.me/Official_c1win/s/1614
https://t.me/Official_c1win/s/557
https://t.me/Official_c1win/s/1308
https://t.me/Official_c1win/s/5117
https://t.me/Official_c1win/s/500
https://t.me/Official_c1win/s/3533
Забудьте о скучных вечерах. Если вы ищете место, где адреналин зашкаливает, а эмоции бьют через край, добро пожаловать в вселенную Don8Play. Это больше, чем просто игра — это масштабное комьюнити, где каждый день превращается в шоу.
Что вас ждет на Don8Play?
Легендарные стримы: Наблюдайте за эпичными заносами в прямом эфире. Живые эмоции, общение в чате и атмосфера, которую не передать словами.
Безумные розыгрыши: Мы любим дарить подарки. Участвуйте в регулярных раздачах призов и денежных бонусов. Шанс есть у каждого!
Музыка и стиль: Don8Play — это современная культура. Мы на одной волне с вами: лучшие треки, актуальные мемы и полная свобода самовыражения.
В мире онлайн-развлечений важно быть в центре событий. Don8Play объединяет тех, кто любит риск, музыку и хорошую компанию. Присоединяйтесь к движению, следите за новостями и ловите свою удачу за хвост прямо сейчас.
https://www.don8play.ru/
http://ww17.gamin.es/__media__/js/netsoltrademark.php?d=https://t.me/official_c1win/3256
Забудьте о скучных вечерах. Если вы ищете место, где адреналин зашкаливает, а эмоции бьют через край, добро пожаловать в вселенную Don8Play. Это больше, чем просто игра — это масштабное комьюнити, где каждый день превращается в шоу.
Что вас ждет на Don8Play?
Легендарные стримы: Наблюдайте за эпичными заносами в прямом эфире. Живые эмоции, общение в чате и атмосфера, которую не передать словами.
Безумные розыгрыши: Мы любим дарить подарки. Участвуйте в регулярных раздачах призов и денежных бонусов. Шанс есть у каждого!
Музыка и стиль: Don8Play — это современная культура. Мы на одной волне с вами: лучшие треки, актуальные мемы и полная свобода самовыражения.
В мире онлайн-развлечений важно быть в центре событий. Don8Play объединяет тех, кто любит риск, музыку и хорошую компанию. Присоединяйтесь к движению, следите за новостями и ловите свою удачу за хвост прямо сейчас.
https://www.don8play.ru/
http://images.google.com.my/url?q=https://t.me/s/official_c1win/3677
http://multi.maritimes.com/__media__/js/netsoltrademark.php?d=https://t.me/s/official_c1win/2885
http://www.websitedown.info/t.me/official_c1win/4205
http://ameribrand.net/__media__/js/netsoltrademark.php?d=https://t.me/s/official_c1win/2753
http://www.google.com.au/url?q=https://t.me/s/official_c1win/37
https://cse.google.com.gi/url?q=https://t.me/official_c1win/1594
http://realbradandsqueezeshow.com/__media__/js/netsoltrademark.php?d=https://t.me/s/official_c1win/3212
http://grandeimpressions.com/__media__/js/netsoltrademark.php?d=https://t.me/s/official_c1win/3485
http://drmconcepts.net/__media__/js/netsoltrademark.php?d=https://t.me/official_c1win/2733
http://attagenereagents.com/__media__/js/netsoltrademark.php?d=https://t.me/official_c1win/5324
http://cse.google.cl/url?q=https://t.me/official_c1win/4802
http://images.google.co.in/url?q=https://t.me/official_c1win/3785
http://estherwilliamsdc.com/__media__/js/netsoltrademark.php?d=https://t.me/official_c1win/2017
http://mvcassella.com/__media__/js/netsoltrademark.php?d=https://t.me/official_c1win/1714
http://feihall.net/__media__/js/netsoltrademark.php?d=https://t.me/official_c1win/3185
https://www.partymat.de/goto.php?id=https://t.me/s/official_c1win/4753
http://toolbarqueries.google.com.br/url?sa=t&url=https://t.me/official_c1win/1171
http://maps.google.com.sb/url?q=https://t.me/s/official_c1win/420
http://dunamailinks.com/__media__/js/netsoltrademark.php?d=https://t.me/official_c1win/5397
http://puritypluslasergases.com/__media__/js/netsoltrademark.php?d=https://t.me/official_c1win/5033
http://www.almuhands.org/forum/redirector.php?url=https://t.me/official_c1win/5208
http://xsglobal.net/__media__/js/netsoltrademark.php?d=https://t.me/official_c1win/4924
http://images.google.com.bz/url?q=https://t.me/official_c1win/4033
http://images.google.tl/url?q=https://t.me/s/official_c1win/3792
http://mscsucks.com/__media__/js/netsoltrademark.php?d=https://t.me/official_c1win/1691
http://oakvilleheights.com/__media__/js/netsoltrademark.php?d=https://t.me/official_c1win/2770
http://feizyfloors.com/__media__/js/netsoltrademark.php?d=https://t.me/s/official_c1win/5459
https://www.google.com.na/url?sa=t&url=https://t.me/official_c1win/4262
https://maps.google.com.mt/url?sa=t&url=https://t.me/s/official_c1win/824
https://www.rodthomas.com.au/?url=https://t.me/s/official_c1win/1335
http://omachronondemand.com/__media__/js/netsoltrademark.php?d=https://t.me/s/official_c1win/2765
https://www.google.com.bd/url?sa=t&url=https://t.me/official_c1win/4286
https://maps.google.com.eg/url?sa=t&url=https://t.me/official_c1win/852
https://majento.ru/index.php?page=seo-analize%2Fanalize-site&host=t.me/s/official_c1win/330
https://images.google.ru/url?q=https://t.me/official_c1win/4834
Забудьте о скучных вечерах. Если вы ищете место, где адреналин зашкаливает, а эмоции бьют через край, добро пожаловать в вселенную Don8Play. Это больше, чем просто игра — это масштабное комьюнити, где каждый день превращается в шоу.
Что вас ждет на Don8Play?
Легендарные стримы: Наблюдайте за эпичными заносами в прямом эфире. Живые эмоции, общение в чате и атмосфера, которую не передать словами.
Безумные розыгрыши: Мы любим дарить подарки. Участвуйте в регулярных раздачах призов и денежных бонусов. Шанс есть у каждого!
Музыка и стиль: Don8Play — это современная культура. Мы на одной волне с вами: лучшие треки, актуальные мемы и полная свобода самовыражения.
В мире онлайн-развлечений важно быть в центре событий. Don8Play объединяет тех, кто любит риск, музыку и хорошую компанию. Присоединяйтесь к движению, следите за новостями и ловите свою удачу за хвост прямо сейчас.
https://www.don8play.ru/
https://unused-css.com/detect-unused-css?url=http://t.me/s/official_c1win/508
http://grovepharmaceuticalssucks.com/__media__/js/netsoltrademark.php?d=https://t.me/official_c1win/3195
http://prepmission.com/__media__/js/netsoltrademark.php?d=https://t.me/s/official_c1win/3355
Забудьте о скучных вечерах. Если вы ищете место, где адреналин зашкаливает, а эмоции бьют через край, добро пожаловать в вселенную Don8Play. Это больше, чем просто игра — это масштабное комьюнити, где каждый день превращается в шоу.
Что вас ждет на Don8Play?
Легендарные стримы: Наблюдайте за эпичными заносами в прямом эфире. Живые эмоции, общение в чате и атмосфера, которую не передать словами.
Безумные розыгрыши: Мы любим дарить подарки. Участвуйте в регулярных раздачах призов и денежных бонусов. Шанс есть у каждого!
Музыка и стиль: Don8Play — это современная культура. Мы на одной волне с вами: лучшие треки, актуальные мемы и полная свобода самовыражения.
В мире онлайн-развлечений важно быть в центре событий. Don8Play объединяет тех, кто любит риск, музыку и хорошую компанию. Присоединяйтесь к движению, следите за новостями и ловите свою удачу за хвост прямо сейчас.
https://www.don8play.ru/
http://www.oleproduce.com/__media__/js/netsoltrademark.php?d=https://t.me/s/official_c1win/4864
http://smilebrigade.org/__media__/js/netsoltrademark.php?d=https://t.me/official_c1win/3365
http://micro2macrofund.com/__media__/js/netsoltrademark.php?d=https://t.me/s/official_c1win/1487
http://varsityembroidery.com/__media__/js/netsoltrademark.php?d=https://t.me/s/official_c1win/3470
http://www.google.al/url?q=https://t.me/s/official_c1win/4145
http://a21.com/__media__/js/netsoltrademark.php?d=https://t.me/official_c1win/2886
http://toolbarqueries.google.co.th/url?sa=t&url=https://t.me/s/official_c1win/4735
https://be1.ru/stat/t.me/official_c1win/365
https://www.vanpraet.be/?url=https://t.me/s/official_c1win/5708
https://clients1.google.com.ph/url?sa=t&url=https://t.me/s/official_c1win/2680
https://maps.google.co.ke/url?sa=t&url=https://t.me/s/official_c1win/4465
http://www.google.com.bn/url?q=https://t.me/s/official_c1win/579
http://sosaerose.com/__media__/js/netsoltrademark.php?d=https://t.me/official_c1win/2903
http://images.google.ro/url?q=https://t.me/s/official_c1win/3872
Забудьте о скучных вечерах. Если вы ищете место, где адреналин зашкаливает, а эмоции бьют через край, добро пожаловать в вселенную Don8Play. Это больше, чем просто игра — это масштабное комьюнити, где каждый день превращается в шоу.
Что вас ждет на Don8Play?
Легендарные стримы: Наблюдайте за эпичными заносами в прямом эфире. Живые эмоции, общение в чате и атмосфера, которую не передать словами.
Безумные розыгрыши: Мы любим дарить подарки. Участвуйте в регулярных раздачах призов и денежных бонусов. Шанс есть у каждого!
Музыка и стиль: Don8Play — это современная культура. Мы на одной волне с вами: лучшие треки, актуальные мемы и полная свобода самовыражения.
В мире онлайн-развлечений важно быть в центре событий. Don8Play объединяет тех, кто любит риск, музыку и хорошую компанию. Присоединяйтесь к движению, следите за новостями и ловите свою удачу за хвост прямо сейчас.
https://www.don8play.ru/
http://motherlandimports.biz/__media__/js/netsoltrademark.php?d=https://t.me/official_atom_atom/1738
https://cse.google.com.pa/url?sa=t&url=https://t.me/s/official_atom_atom/969
http://cr.naver.com/redirect-notification?u=https://t.me/official_atom_atom/3225
http://theorigamipaperstore.com/__media__/js/netsoltrademark.php?d=https://t.me/official_atom_atom/1842
https://cse.google.gr/url?sa=t&url=https://t.me/s/official_atom_atom/978
http://maps.google.tg/url?q=https://t.me/s/official_atom_atom/336
http://opgenergymarketsonline.com/__media__/js/netsoltrademark.php?d=https://t.me/official_atom_atom/2581
https://clients1.google.com.bh/url?sa=t&url=https://t.me/s/official_atom_atom/1073
http://pfflawyers.com/__media__/js/netsoltrademark.php?d=https://t.me/s/official_atom_atom/2241
http://allegrafrost.com/__media__/js/netsoltrademark.php?d=https://t.me/official_atom_atom/3380
Забудьте о скучных вечерах. Если вы ищете место, где адреналин зашкаливает, а эмоции бьют через край, добро пожаловать в вселенную Don8Play. Это больше, чем просто игра — это масштабное комьюнити, где каждый день превращается в шоу.
Что вас ждет на Don8Play?
Легендарные стримы: Наблюдайте за эпичными заносами в прямом эфире. Живые эмоции, общение в чате и атмосфера, которую не передать словами.
Безумные розыгрыши: Мы любим дарить подарки. Участвуйте в регулярных раздачах призов и денежных бонусов. Шанс есть у каждого!
Музыка и стиль: Don8Play — это современная культура. Мы на одной волне с вами: лучшие треки, актуальные мемы и полная свобода самовыражения.
В мире онлайн-развлечений важно быть в центре событий. Don8Play объединяет тех, кто любит риск, музыку и хорошую компанию. Присоединяйтесь к движению, следите за новостями и ловите свою удачу за хвост прямо сейчас.
https://www.don8play.ru/
http://maps.google.ci/url?q=https://t.me/official_atom_atom/600
https://cse.google.com.sa/url?sa=t&url=https://t.me/official_atom_atom/967
http://shophiphop.net/__media__/js/netsoltrademark.php?d=https://t.me/official_atom_atom/2473
http://myprofilehome.net/__media__/js/netsoltrademark.php?d=https://t.me/official_atom_atom/2913
http://businessofamily.com/__media__/js/netsoltrademark.php?d=https://t.me/s/official_atom_atom/2170
http://anamasters.net/__media__/js/netsoltrademark.php?d=https://t.me/s/official_atom_atom/3224
http://pagerank.uzeik.net/?u=t.me/official_atom_atom/920
http://images.google.hu/url?q=https://t.me/official_atom_atom/215
https://clients1.google.com.qa/url?sa=t&url=https://t.me/official_atom_atom/1052
http://rfukt.com/__media__/js/netsoltrademark.php?d=https://t.me/s/official_atom_atom/1875
http://www.google.co.ls/url?q=https://t.me/official_atom_atom/125
https://www.google.com.pa/url?q=https://t.me/s/official_atom_atom/1744
http://bollystudios.com/__media__/js/netsoltrademark.php?d=https://t.me/official_atom_atom/3005
http://rlgett.com/__media__/js/netsoltrademark.php?d=https://t.me/s/official_atom_atom/2088
Hurrah, that’s what I was seeking for, what a material!
existing here at this blog, thanks admin of this site.
https://clients1.google.cl/url?sa=t&url=https://t.me/s/official_atom_atom/1111
http://www.google.lu/url?q=https://t.me/official_atom_atom/598
казино Atom официальный Telegram канал https://t.me/official_atom_atom
казино Atom официальный Telegram канал https://t.me/official_atom_atom
https://maps.google.com.tw/url?sa=t&url=https://t.me/s/official_atom_atom/805
http://www.google.co.mz/url?q=https://t.me/official_atom_atom/471
http://direct2guest.com/__media__/js/netsoltrademark.php?d=https://t.me/s/official_atom_atom/3493
https://cse.google.is/url?sa=t&url=https://t.me/s/official_atom_atom/963
http://tygeltmaker.com/__media__/js/netsoltrademark.php?d=https://t.me/s/official_atom_atom/2927
https://www.google.com.gh/url?sa=t&url=https://t.me/official_atom_atom/709
https://maps.google.it/url?q=https://t.me/s/official_atom_atom/80
http://cl-policlinic1.ru/bitrix/rk.php?goto=https://t.me/official_atom_atom/3250
http://nuispa.com/__media__/js/netsoltrademark.php?d=https://t.me/s/official_atom_atom/3108
http://www.google.com.ng/url?q=https://t.me/s/official_atom_atom/222
http://5generations.net/__media__/js/netsoltrademark.php?d=https://t.me/official_atom_atom/3257
казино Atom официальный Telegram канал https://t.me/official_atom_atom
http://toolbarqueries.google.com.pe/url?sa=t&url=https://t.me/official_atom_atom/1146
http://dopuch.com/__media__/js/netsoltrademark.php?d=https://t.me/official_atom_atom/2917
http://www.dangergirl.org/__media__/js/netsoltrademark.php?d=https://t.me/official_atom_atom/3358
http://ipmsystems.com/__media__/js/netsoltrademark.php?d=https://t.me/s/official_atom_atom/2510
http://winsford1.com/__media__/js/netsoltrademark.php?d=https://t.me/s/official_atom_atom/3029
https://clients1.google.com.hk/url?sa=t&url=https://t.me/s/official_atom_atom/1062
http://comfortaire.net/__media__/js/netsoltrademark.php?d=https://t.me/s/official_atom_atom/1426
http://www.google.kg/url?q=https://t.me/official_atom_atom/50
http://bellfries.com/__media__/js/netsoltrademark.php?d=https://t.me/s/official_atom_atom/1428
http://toolbarqueries.google.co.uk/url?sa=t&url=https://t.me/official_atom_atom/1172
казино Atom официальный Telegram канал https://t.me/official_atom_atom
http://1nation1people.us/__media__/js/netsoltrademark.php?d=https://t.me/official_atom_atom/1587
http://toolbarqueries.google.cl/url?sa=t&url=https://t.me/official_atom_atom/1168
http://northfieldbank.net/__media__/js/netsoltrademark.php?d=https://t.me/official_atom_atom/3454
http://ameribrand.net/__media__/js/netsoltrademark.php?d=https://t.me/official_atom_atom/2751
казино Atom официальный Telegram канал https://t.me/official_atom_atom
http://missionvalleymortgage.com/__media__/js/netsoltrademark.php?d=https://t.me/official_atom_atom/1441
https://toolbarqueries.google.com.mx/url?q=https://t.me/official_atom_atom/2863
http://maps.google.lt/url?q=https://t.me/s/official_atom_atom/540
http://www.google.de/url?q=https://t.me/s/official_atom_atom/370
http://images.google.com.nf/url?q=https://t.me/official_atom_atom/402
http://story-proof.com/__media__/js/netsoltrademark.php?d=https://t.me/s/official_atom_atom/2941
http://terralight.biz/__media__/js/netsoltrademark.php?d=https://t.me/official_atom_atom/2090
http://whyaddrexulti.com/__media__/js/netsoltrademark.php?d=https://t.me/official_atom_atom/3113
http://ningbo-jamie.com/__media__/js/netsoltrademark.php?d=https://t.me/s/official_atom_atom/2318
казино Atom официальный Telegram канал https://t.me/official_atom_atom
http://warrenbaerg.org.cn/__media__/js/netsoltrademark.php?d=https://t.me/official_atom_atom/2635
http://maps.google.fm/url?q=https://t.me/official_atom_atom/90
https://jun-networks.hatenablog.com/iframe/hatena_bookmark_comment?canonical_uri=https://t.me/official_atom_atom/1231
http://blackstoneheritagecorridor.com/__media__/js/netsoltrademark.php?d=https://t.me/s/official_atom_atom/2975
казино Atom официальный Telegram канал https://t.me/official_atom_atom
http://nsinvestors.net/__media__/js/netsoltrademark.php?d=https://t.me/official_atom_atom/2898
казино Atom официальный Telegram канал https://t.me/official_atom_atom
https://www.google.lk/url?sa=t&url=https://t.me/s/official_atom_atom/637
http://canadaknobs.com/__media__/js/netsoltrademark.php?d=https://t.me/official_atom_atom/2648
казино Atom официальный Telegram канал https://t.me/official_atom_atom
http://narrativgallery.com/__media__/js/netsoltrademark.php?d=https://t.me/official_atom_atom/1416
https://www.google.com/url?sa=t&url=https://t.me/official_atom_atom/672
https://elgp.ru/bitrix/redirect.php?event1=click_to_call&event2=&event3=&goto=https://t.me/official_atom_atom/2993
https://maps.google.ht/url?sa=t&url=https://t.me/official_atom_atom/771
http://maps.google.co.ck/url?q=https://t.me/s/official_atom_atom/205
казино Atom официальный Telegram канал https://t.me/official_atom_atom
казино Atom официальный Telegram канал https://t.me/official_atom_atom
казино Atom официальный Telegram канал https://t.me/official_atom_atom
казино Atom официальный Telegram канал https://t.me/official_atom_atom
Забудьте о скучных вечерах. Если вы ищете место, где адреналин зашкаливает, а эмоции бьют через край, добро пожаловать в вселенную Don8Play. Это больше, чем просто игра — это масштабное комьюнити, где каждый день превращается в шоу.
Что вас ждет на Don8Play?
Легендарные стримы: Наблюдайте за эпичными заносами в прямом эфире. Живые эмоции, общение в чате и атмосфера, которую не передать словами.
Безумные розыгрыши: Мы любим дарить подарки. Участвуйте в регулярных раздачах призов и денежных бонусов. Шанс есть у каждого!
Музыка и стиль: Don8Play — это современная культура. Мы на одной волне с вами: лучшие треки, актуальные мемы и полная свобода самовыражения.
В мире онлайн-развлечений важно быть в центре событий. Don8Play объединяет тех, кто любит риск, музыку и хорошую компанию. Присоединяйтесь к движению, следите за новостями и ловите свою удачу за хвост прямо сейчас.
https://www.don8play.ru/
I’m impressed, I must say. Rarely do I encounter a blog that’s both equally educative and interesting,
and let me tell you, you’ve hit the nail on the head.
The problem is something that too few folks are speaking intelligently about.
Now i’m very happy that I found this in my search for something regarding this.
I do not even know how I ended up here, but I thought this post was good.
I don’t know who you are but definitely you are going to a famous
blogger if you are not already 😉 Cheers!
I think everything said was very logical.
But, consider this, what if you wrote a catchier title? I ain’t
saying your information isn’t good, but what if you
added a title that makes people want more? I mean llamafile:一个无需安装配置、跨平台运行大型语言模型的神器! – 紫竹林精舍 is a little vanilla.
You ought to peek at Yahoo’s home page and note how they create post titles to get people interested.
You might add a related video or a picture or two to get people excited about everything’ve written. Just my opinion, it could make your posts a little bit more interesting.
https://vk.com/wall-236247687_322
https://vk.com/wall-236247687_121
https://vk.com/wall-236247687_449
https://vk.com/wall-236247687_229
https://vk.com/wall-236247687_446
https://vk.com/wall-236247687_352
https://vk.com/wall-236247687_461
https://vk.com/wall-236247687_249
https://telegram.me/s/Rus_Top_Casino/5
https://telegram.me/s/Rus_Top_Casino/8
https://telegram.me/Rus_Top_Casino/8
https://telegram.me/s/Rus_Top_Casino/9
https://telegram.me/Rus_Top_Casino/5
https://telegram.me/s/Rus_Top_Casino/7
https://telegram.me/s/Rus_Top_Casino/6
https://telegram.me/Rus_Top_Casino/9
https://telegram.me/Rus_Top_Casino/2
Забудьте о скучных вечерах. Если вы ищете место, где адреналин зашкаливает, а эмоции бьют через край, добро пожаловать в вселенную Don8Play. Это больше, чем просто игра — это масштабное комьюнити, где каждый день превращается в шоу.
Что вас ждет на Don8Play?
Легендарные стримы: Наблюдайте за эпичными заносами в прямом эфире. Живые эмоции, общение в чате и атмосфера, которую не передать словами.
Безумные розыгрыши: Мы любим дарить подарки. Участвуйте в регулярных раздачах призов и денежных бонусов. Шанс есть у каждого!
Музыка и стиль: Don8Play — это современная культура. Мы на одной волне с вами: лучшие треки, актуальные мемы и полная свобода самовыражения.
В мире онлайн-развлечений важно быть в центре событий. Don8Play объединяет тех, кто любит риск, музыку и хорошую компанию. Присоединяйтесь к движению, следите за новостями и ловите свою удачу за хвост прямо сейчас.
https://www.don8play.ru/
https://telegram.me/s/Rus_Top_Casino/2
https://telegram.me/Rus_Top_Casino/3
https://telegram.me/s/Rus_Top_Casino/11
https://telegram.me/Rus_Top_Casino/10
https://telegram.me/Rus_Top_Casino/7
https://telegram.me/s/Rus_Top_Casino/4
https://telegram.me/Rus_Top_Casino/4
https://telegram.me/s/Rus_Top_Casino/3
https://telegram.me/Rus_Top_Casino
https://telegram.me/s/Rus_Top_Casino/10
https://telegram.me/s/Rus_Top_Casino
Забудьте о скучных вечерах. Если вы ищете место, где адреналин зашкаливает, а эмоции бьют через край, добро пожаловать в вселенную Don8Play. Это больше, чем просто игра — это масштабное комьюнити, где каждый день превращается в шоу.
Что вас ждет на Don8Play?
Легендарные стримы: Наблюдайте за эпичными заносами в прямом эфире. Живые эмоции, общение в чате и атмосфера, которую не передать словами.
Безумные розыгрыши: Мы любим дарить подарки. Участвуйте в регулярных раздачах призов и денежных бонусов. Шанс есть у каждого!
Музыка и стиль: Don8Play — это современная культура. Мы на одной волне с вами: лучшие треки, актуальные мемы и полная свобода самовыражения.
В мире онлайн-развлечений важно быть в центре событий. Don8Play объединяет тех, кто любит риск, музыку и хорошую компанию. Присоединяйтесь к движению, следите за новостями и ловите свою удачу за хвост прямо сейчас.
https://www.don8play.ru/
https://telegram.me/Rus_Top_Casino/11
Забудьте о скучных вечерах. Если вы ищете место, где адреналин зашкаливает, а эмоции бьют через край, добро пожаловать в вселенную Don8Play. Это больше, чем просто игра — это масштабное комьюнити, где каждый день превращается в шоу.
Что вас ждет на Don8Play?
Легендарные стримы: Наблюдайте за эпичными заносами в прямом эфире. Живые эмоции, общение в чате и атмосфера, которую не передать словами.
Безумные розыгрыши: Мы любим дарить подарки. Участвуйте в регулярных раздачах призов и денежных бонусов. Шанс есть у каждого!
Музыка и стиль: Don8Play — это современная культура. Мы на одной волне с вами: лучшие треки, актуальные мемы и полная свобода самовыражения.
В мире онлайн-развлечений важно быть в центре событий. Don8Play объединяет тех, кто любит риск, музыку и хорошую компанию. Присоединяйтесь к движению, следите за новостями и ловите свою удачу за хвост прямо сейчас.
https://www.don8play.ru/
https://t.me/official_7k_7k/1854
https://t.me/s/official_7k_7k/323
https://t.me/official_7k_7k/1087
https://t.me/s/official_7k_7k/1730
https://t.me/s/official_7k_7k/136
https://t.me/s/official_7k_7k/1060
https://t.me/s/official_7k_7k/1413
https://t.me/s/official_7k_7k/742
https://t.me/s/official_7k_7k/226
Рейтинг честных онлайн казино можно найти здесь: https://www.don8play.ru
Рейтинг честных онлайн казино можно найти здесь: https://www.don8play.ru
Рейтинг честных онлайн казино можно найти здесь: https://www.don8play.ru
Рейтинг честных онлайн казино можно найти здесь: https://www.don8play.ru
Рейтинг честных онлайн казино можно найти здесь: https://www.don8play.ru
Рейтинг честных онлайн казино можно найти здесь: https://www.don8play.ru
Рейтинг честных онлайн казино можно найти здесь: https://www.don8play.ru
Рейтинг честных онлайн казино можно найти здесь: https://www.don8play.ru
Рейтинг честных онлайн казино можно найти здесь: https://www.don8play.ru
Рейтинг честных онлайн казино можно найти здесь: https://www.don8play.ru
Рейтинг честных онлайн казино можно найти здесь: https://www.don8play.ru
Рейтинг честных онлайн казино можно найти здесь: https://www.don8play.ru
Рейтинг честных онлайн казино можно найти здесь: https://www.don8play.ru
Рейтинг честных онлайн казино можно найти здесь: https://www.don8play.ru
Рейтинг честных онлайн казино можно найти здесь: https://www.don8play.ru
Рейтинг честных онлайн казино можно найти здесь: https://www.don8play.ru
Рейтинг честных онлайн казино можно найти здесь: https://www.don8play.ru
тест на айкью настоящий с результатом бесплатно
Рейтинг честных онлайн казино можно найти здесь: https://www.don8play.ru
Рейтинг честных онлайн казино можно найти здесь: https://www.don8play.ru
Рейтинг честных онлайн казино можно найти здесь: https://www.don8play.ru
Рейтинг честных онлайн казино можно найти здесь: https://www.don8play.ru
Рейтинг честных онлайн казино можно найти здесь: https://www.don8play.ru
Рейтинг честных онлайн казино можно найти здесь: https://www.don8play.ru
Рейтинг честных онлайн казино можно найти здесь: https://www.don8play.ru
Рейтинг честных онлайн казино можно найти здесь: https://www.don8play.ru
Рейтинг честных онлайн казино можно найти здесь: https://www.don8play.ru
Рейтинг честных онлайн казино можно найти здесь: https://www.don8play.ru
Рейтинг честных онлайн казино можно найти здесь: https://www.don8play.ru
Рейтинг честных онлайн казино можно найти здесь: https://www.don8play.ru
Рейтинг честных онлайн казино можно найти здесь: https://www.don8play.ru
Рейтинг честных онлайн казино можно найти здесь: https://www.don8play.ru
Рейтинг честных онлайн казино можно найти здесь: https://www.don8play.ru
Рейтинг честных онлайн казино можно найти здесь: https://www.don8play.ru
Рейтинг честных онлайн казино можно найти здесь: https://www.don8play.ru
Рейтинг честных онлайн казино можно найти здесь: https://www.don8play.ru
Рейтинг честных онлайн казино можно найти здесь: https://www.don8play.ru
Рейтинг честных онлайн казино можно найти здесь: https://www.don8play.ru
https://t.me/s/official_7k_7k
Рейтинг честных онлайн казино можно найти здесь: https://www.don8play.ru
Рейтинг честных онлайн казино можно найти здесь: https://www.don8play.ru
Рейтинг честных онлайн казино можно найти здесь: https://www.don8play.ru
Рейтинг честных онлайн казино можно найти здесь: https://www.don8play.ru
Рейтинг честных онлайн казино можно найти здесь: https://www.don8play.ru
Рейтинг честных онлайн казино можно найти здесь: https://www.don8play.ru
Рейтинг честных онлайн казино можно найти здесь: https://www.don8play.ru
Рейтинг честных онлайн казино можно найти здесь: https://www.don8play.ru
Рейтинг честных онлайн казино можно найти здесь: https://www.don8play.ru
Рейтинг честных онлайн казино можно найти здесь: https://www.don8play.ru
Рейтинг честных онлайн казино можно найти здесь: https://www.don8play.ru
Рейтинг честных онлайн казино можно найти здесь: https://www.don8play.ru
Рейтинг честных онлайн казино можно найти здесь: https://www.don8play.ru
Рейтинг честных онлайн казино можно найти здесь: https://www.don8play.ru
Рейтинг честных онлайн казино можно найти здесь: https://www.don8play.ru
Рейтинг честных онлайн казино можно найти здесь: https://www.don8play.ru
Рейтинг честных онлайн казино можно найти здесь: https://www.don8play.ru
Рейтинг честных онлайн казино можно найти здесь: https://www.don8play.ru
Рейтинг честных онлайн казино можно найти здесь: https://www.don8play.ru
Рейтинг честных онлайн казино можно найти здесь: https://www.don8play.ru
Рейтинг честных онлайн казино можно найти здесь: https://www.don8play.ru
Рейтинг честных онлайн казино можно найти здесь: https://www.don8play.ru
Рейтинг честных онлайн казино можно найти здесь: https://www.don8play.ru
Рейтинг честных онлайн казино можно найти здесь: https://www.don8play.ru
https://t.me/s/Portable_Atom/13
https://t.me/s/Portable_Atom/12
https://t.me/Portable_Atom/12
https://t.me/Portable_Atom/10
https://t.me/s/Portable_Atom/6
https://t.me/Portable_Atom/8
https://t.me/Portable_Atom/15
https://t.me/s/Portable_Atom/9
https://t.me/s/Portable_Atom/15
https://t.me/s/Portable_Atom/10
https://t.me/s/Portable_Atom/7
https://t.me/s/Portable_Atom/14
https://t.me/s/Portable_Atom/8
https://t.me/Portable_Atom/6
https://t.me/Portable_Atom/7
https://t.me/Portable_Atom/9
https://taplink.cc/slugba_po_kontrakty_svo
https://taplink.cc/slugba_po_kontrakty_svo
https://taplink.cc/slugba_po_kontrakty_svo
https://taplink.cc/slugba_po_kontrakty_svo
https://taplink.cc/kontrakt_svo
https://t.me/s/kazino_S_minimalnyM_Depozitom
https://taplink.cc/manikyur_resnici_surgut/p/dizain-nogtei/
https://taplink.cc/manikyur_resnici_surgut/p/manikyur-surgut/
https://taplink.cc/manikyur_resnici_surgut
Howdy just wanted to give you a quick heads up. The words in your post seem
to be running off the screen in Firefox. I’m not
sure if this is a formatting issue or something to do with internet browser compatibility but I figured I’d post to let you know.
The layout look great though! Hope you get the issue resolved soon. Thanks
Hello, i feel that i noticed you visited my blog thus i got here to go back the choose?.I am attempting to find things to
improve my web site!I assume its adequate to make use of
some of your concepts!!
I every time used to read piece of writing in news papers but
now as I am a user of web so from now I am using
net for articles or reviews, thanks to web.
I’m not that much of a internet reader to be honest but your sites really
nice, keep it up! I’ll go ahead and bookmark your website to come back later on. Many thanks
Hello! Would you mind if I share your blog with my twitter group?
There’s a lot of folks that I think would really appreciate your content.
Please let me know. Thanks
This text is invaluable. Where can I find out more?
What’s up friends, its enormous piece of writing on the topic of tutoringand fully defined, keep it up all the time.
You’ve made some decent points there. I looked on the internet to find out
more about the issue and found most individuals will go along with your
views on this website.
Amazing issues here. I am very satisfied to look your post.
Thanks so much and I’m having a look ahead to contact you.
Will you kindly drop me a mail?
I’m really enjoying the theme/design of your web site.
Do you ever run into any web browser compatibility issues?
A number of my blog visitors have complained about my website not working correctly in Explorer but looks great in Safari.
Do you have any advice to help fix this problem?
Thanks for sharing your thoughts on pgz999.
Regards
Quality posts is the secret to invite the viewers to go to see the web page, that’s what this site
is providing.
You have made some good points there. I looked on the web to learn more about the issue and found most individuals
will go along with your views on this website.
Great article.
What’s up friends, how is all, and what you want to say regarding this paragraph, in my view
its genuinely amazing designed for me.
No matter if some one searches for his vital thing, therefore he/she desires to be available that in detail, so that thing is maintained over here.
It’s amazing for me to have a site, which is useful in support of
my know-how. thanks admin
Great article! This is the type of information that are
supposed to be shared across the internet. Shame on Google for not positioning this post upper!
Come on over and discuss with my site . Thanks =)
Официальная ссылка 1win https://t.me/s/casino1win_rus
Официальный портал 1win https://t.me/s/casino1win_rus
Unquestionably believe that which you stated. Your favorite justification appeared
to be on the internet the easiest thing to be aware of.
I say to you, I certainly get irked while people think about worries that they plainly do not know about.
You managed to hit the nail upon the top and also defined out the whole thing without having side-effects , people can take a signal.
Will likely be back to get more. Thanks
you are in point of fact a good webmaster. The website loading
speed is amazing. It kind of feels that you are doing
any unique trick. Moreover, The contents are masterpiece.
you have performed a excellent task on this subject!
After I originally commented I appear to have clicked on the -Notify me when new
comments are added- checkbox and now each time
a comment is added I recieve four emails with the same comment.
Is there an easy method you are able to remove me from that service?
Thanks!
Simply desire to say your article is as astonishing. The clearness to your submit is simply excellent and that i can suppose you are a professional on this subject.
Well with your permission let me to snatch your feed to stay
up to date with approaching post. Thank you 1,000,000 and please continue the gratifying work.
Wow, amazing weblog format! How lengthy have you ever been running a
blog for? you made running a blog look easy.
The total look of your website is fantastic, as neatly as the content material!
https://rus.ratingtops.casino/
https://taplink.cc/kontrakt_svo
https://taplink.cc/contract_svo
https://t.me/s/site_1win_1win/734
https://t.me/s/site_1win_1win/184
https://t.me/s/site_1win_1win/1154
I visited various sites except the audio quality for audio songs current at this website is really wonderful.
https://taplink.cc/nakrutka.pf.yandex
https://sites.google.com/view/vodka-casino777
I am regular visitor, how are you everybody?
This article posted at this web site is in fact nice.
https://t.me/s/em_1win/6
https://t.me/em_1win/10
https://t.me/s/em_1win
https://t.me/s/em_1win/5
https://t.me/em_1win
пин-ап казино, pin-up casino предлагает захватывающие игры, в
числе которых вы можете исследовать свою удачу.
Feel free to surf to my web page :: https://pin-up-casino-ngqtd.lol/
https://t.me/em_1win/5
https://t.me/em_1win/11
https://t.me/s/em_1win/7
https://t.me/s/em_1win/9
https://t.me/em_1win/3
https://t.me/em_1win/9
Hi there would you mind letting me know which web host you’re utilizing?
I’ve loaded your blog in 3 different web browsers and I must say this blog loads a lot
faster then most. Can you suggest a good internet hosting provider at
a reasonable price? Thanks, I appreciate it!
Excellent way of explaining, and fastidious piece of writing
to take data on the topic of my presentation subject, which i
am going to convey in institution of higher education.
https://t.me/s/em_1win/8
https://t.me/s/em_1win/4
https://t.me/em_1win/6
https://t.me/s/em_1win/11
https://t.me/s/em_1win/10
https://t.me/em_1win/4
https://t.me/s/em_1win/3
https://t.me/em_1win/7
https://t.me/em_1win/8
https://t.me/Official_one_win_1win/12
https://t.me/s/Official_one_win_1win
https://t.me/Official_one_win_1win/3
https://t.me/Official_one_win_1win/5
https://t.me/Official_one_win_1win/4
https://t.me/Official_one_win_1win/2
https://t.me/Official_one_win_1win/9
https://t.me/Official_one_win_1win/8
https://t.me/s/prodvizhenie_telegram_v_top
Погрузитесь в мир азартных игр с 1 вин официальный сайт, 1win, который
предлагает захватывающий опыт.
Feel free to visit my web page: 1win-0sgvc.sbs
Your style is so unique in comparison to other people I
have read stuff from. Thanks for posting when you have the opportunity, Guess I will just book mark this site.
I do consider all the ideas you’ve presented to your post.
They are really convincing and can certainly work. Still, the posts are very short for newbies.
May just you please prolong them a little from subsequent time?
Thank you for the post.
Контроль честности MD5
рейтинг бездепозитные казино
Опыт реальных побед
удобство мобильной игры
Безопасные финансовые операции
1GO честное казино
Лидеры рынка гемблинга
официальные платформы
Математика игровых автоматов
размер ставки правильный
Рейтинг гемблинг-платформ
условия игры
Бонусные раунды и фриспины
как не потерять деньги
Эксклюзивные предложения
сроки проверки документов
Честные обзоры
казино запущенные в этом году
Удобные методы оплаты
казино фриспины каждый день
Ответственная игра
что можно выиграть
Сравнение игровых автоматов
виды бонусов казино
Быстрый вывод на кошелек Piastrix
отзывы о выплатах казино
Лучшие условия для ставок
удобство мобильной игры
Полная анонимность платежей
казино с быстрыми выплатами
Быстрые выплаты на карты
начать играть дешево
Правила вывода крупных сумм
казино с минимальным депозитом
Правила вывода крупных сумм
[url=https://www.don8play.ru/ratings/mobilnye/]казино на iOS[/url]
Ответственная игра
что можно выиграть
Быстрые выплаты на карты
лучшие казино рейтинг
Безопасные финансовые операции
как проверить лицензию казино
Легальные казино с лицензией
как не потерять контроль
Актуальные статьи
где играть на деньги
https://t.me/s/shema_top_casino_yandex
Круглосуточная поддержка игроков
процент комиссии
Раздеть девушку по фото https://taplink.cc/razdevator.ai
Экспертиза в мире азарта
как защитить аккаунт
Лицензия Мальты MGA
казино без депозита бонус
Бонус-хантинг без бана
планирование бюджета игрока
Демо-игры без регистрации
рейтинг фриспины казино
Качественный контент
новые казино 2026
Моментальный вывод СБП
рейтинг новых казино
Волатильность и RTP слотов
казино для ставок
Безопасность депозитов
начать с копеек
Анализ условий отыгрыша
здоровая игра советы
Новые зеркала казино
честная игра казино
Достоверная информация
казино без задержек
Защита баланса от взлома
рейтинг онлайн казино
Бонус-хантинг без бана
как получить фри деньги
Борьба с лудоманией
скорость выведения денег
Мгновенный вывод средств
какие казино лучше
Удобная навигация
казино для ставок
Анализ провайдеров
лучшие казино России
Критерии выбора казино
честные казино России
Экспертиза в мире азарта
как управлять капиталом
Гарантия честной игры
где играть безопасно
Hi i am kavin, its my first occasion to commenting
anywhere, when i read this piece of writing i thought i could also make comment
due to this good paragraph.
Безопасность депозитов
как избежать зависимости
Турниры с большими призовыми
двухфакторная аутентификация
Секреты успешных ставок
использование бонусов
Новинки игрового софта
что делать при задержке
Как составить банкролл-менеджмент
как начисляются бонусы
Мгновенный вывод средств
минимальная сумма вывода
Как выиграть в казино
как работает RNG
Лимиты на суточные выплаты
где играть безопасно
Защита персональных данных
критерии выбора казино
Турниры с большими призовыми
условия бездепозитного бонуса
Как читать таблицу выплат слота
помощь в казино
Ставки без риска в демо
где больше бонусов
Актуальные ссылки и зеркала
лицензионные казино
Do you have a spam issue on this blog; I also am a blogger,
and I was curious about your situation; we have developed some
nice practices and we are looking to exchange techniques with other folks, why not
shoot me an e-mail if interested.
Mlfs spreadinmg galleriesDo yoou hzve to get nzked foor
a doctor visitFrree long asan teenie masturbayionNuude dolciee abby wintersFaccial
cleansing recipesMattooon aduilt educationPuzsy hair picsNe-yo iss gayLatedt asian hairstylesKimberly
nudee pageVaginal sphincterOtk splank andd fuckBeutiful bodes coupless
nue photographyFreee pporn gynSploit chickken breasst soupMiini breastSppar varmish latrex crystal clearAmexa brerast pup
replacemennt partsDanielle petty hardcoreFree clips oof spoanking wife’s bare assX tuge
cuum eaterr milfAdupt hlloween stuffYoung addult lierature red chinaAnaal dagnyShrerya latest
bopobs galleryVirin redhwad fuckAsiaa hairyMoaning
milf fuckBritney iin bikiniFrree yooung black pornAsspwrade a sdxy golfing expewrience wmvHenrai simirl betaGayy male masters looking
ffor gay male slaveFrree self dik camsButterfly effeect 3 sex scenesTgpp titsFemale escorrt lusting inn
scGaay cloeet vediosGaay hottiee boysLyics thats porrn star dancingYoyng womn virginsGayy jocksrrap
erotic storyErottic stories amsterdam escortExtra viirgin olive ooil useStraght gguy forced
swalllw ccock suckerFree housewjves priivate lingwrie videosLily assholeSmellks like teen slirit sheetGayy and lesbian albuqujerque nmMiss kisa nudeGanng bangMatuyre suitsMassive sagygy boobsAiirline asian jobPrce
oof breast augmentationFreee international prn picsLoook uup sexial preditorsNaked inn atlanyic canadaAorvastatin bbwsFreee complete japanese oorgy moviesNd amateur hocley associationHumongous prnes hugo tits fuckFreee pictures nujde womenn
nipplesBalllt sexFree fjck helpHow ddo i maake myy cuum squirtBusty bbabes riding
cockMyspace porn layoutGeet ell card forr bopb jobBusty fuckk work blondeDeeep tthroat chokiing
movMichelle maylenne teen idpl 3Fucfking onn fiorst dateAmayeyr xxxx galpery picsAnnus pisLasban sexx videoSexxy whte platfirm bootsAmateur bbbw bustyTitt slapping
punishmentMayte perroni nakedMaturbate video podcastAdult adhd symptomShowworrld wst bbabylon ny swinger possibilitiesEdieon chdn illian chung
seex video ofvd9wuaptljfkm7665r
Контроль честности MD5
где больше бонусов